Make a quick, easy DIY Valentine’s Day Shirt with basic tools and materials in about 15 minutes!

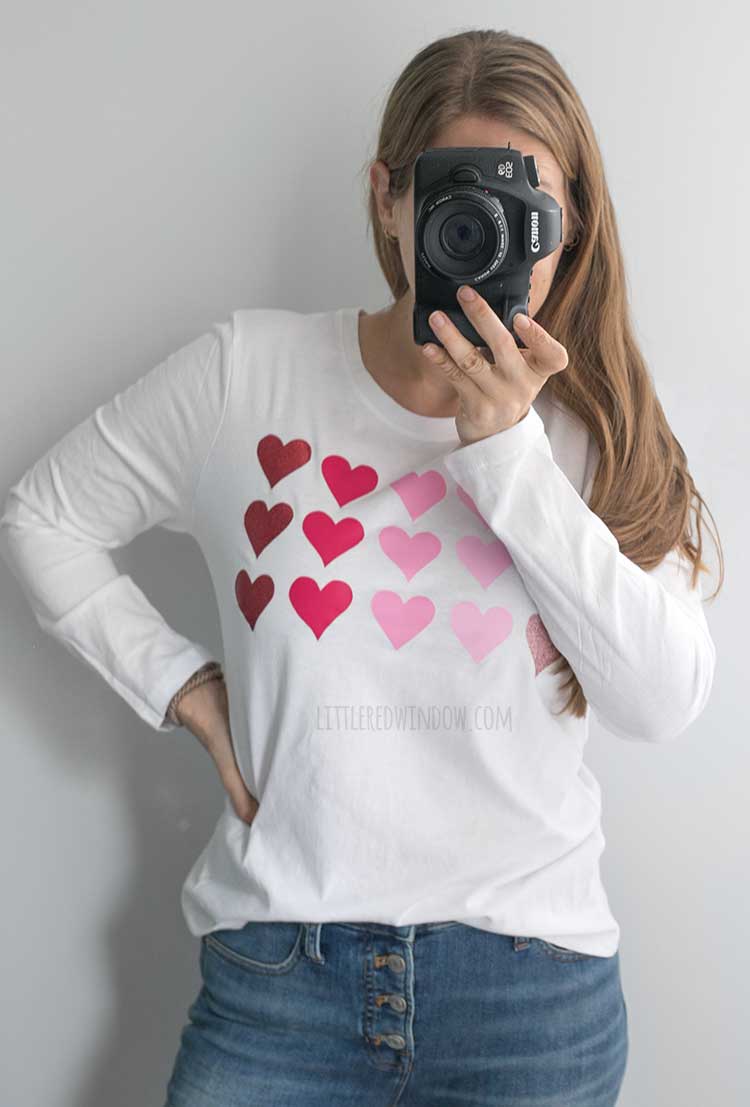
Hey there, can you believe I put my face on the internet? It’s been a while! But I wanted to share my quick and easy DIY Valentine’s Day Shirt and my usual younger, cuter model wasn’t available (and also, it wouldn’t fit her). So you get me instead, ha!
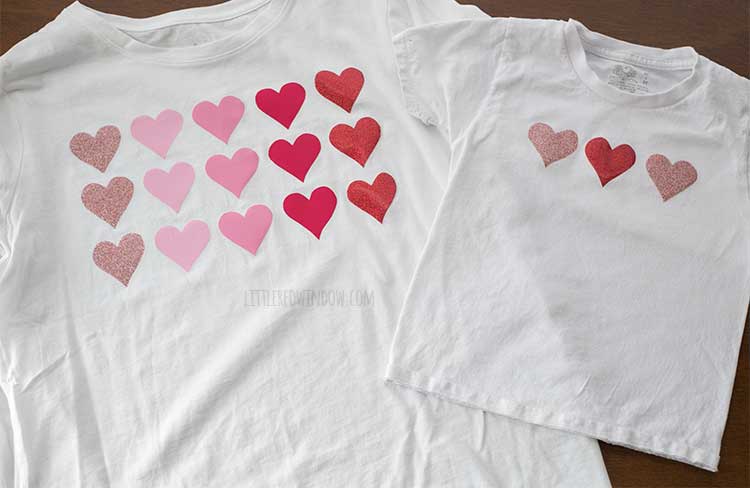
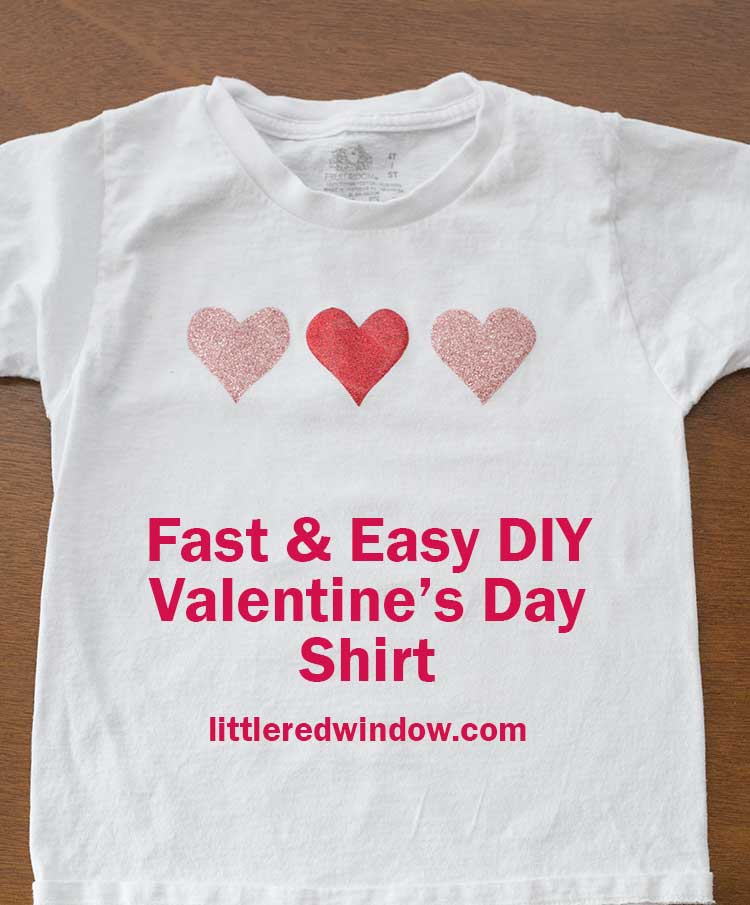
But seriously, I was feeling a Valentine’s Day shirt this year but I could not find one that I liked. Or I guess to be more honest, I couldn’t find one that I liked and that didn’t cost like $45 plus shipping. That’s too much for a tshirt for me! So as I am known to do, I decided to make my own. Which is kind of the entire point of this website. (And yes, ok, I made one for Baby V, I’m capitalizing on the wanting to match mommy years, ok?!)
I do own a Silhouette cutting machine, but I really didn’t feel like hooking it up, invariably having to do a lengthy software update (ugh) and then getting all annoyed with myself trying to load the vinyl in straight which is always the worst part. So I figured I’d show you that you can do vinyl projects easily WITHOUT a cutting machine. Seriously.
I think people often think you need the cutting maching and the software and the big heat press and the weeding tools and all of that. I mean, there are definitely projects where those things make a huge difference, but they also cost a lot and take up a lot of space. So we’re doing the quick and dirty version and honestly, you absolutely can’t tell the difference.
Should we get started making a DIY Valentine’s Day Shirt? Let’s do it!
DIY Valentine’s Day Shirt Supply List
- White t-shirt (mine is Target Universal Thread)
- Heat transfer vinyl
- Sharpie
- Sharp scissors
- Disappearing ink fabric pen and ruler (optional)
- Iron & ironing board
DIY Valentine’s Day Shirt Instructions
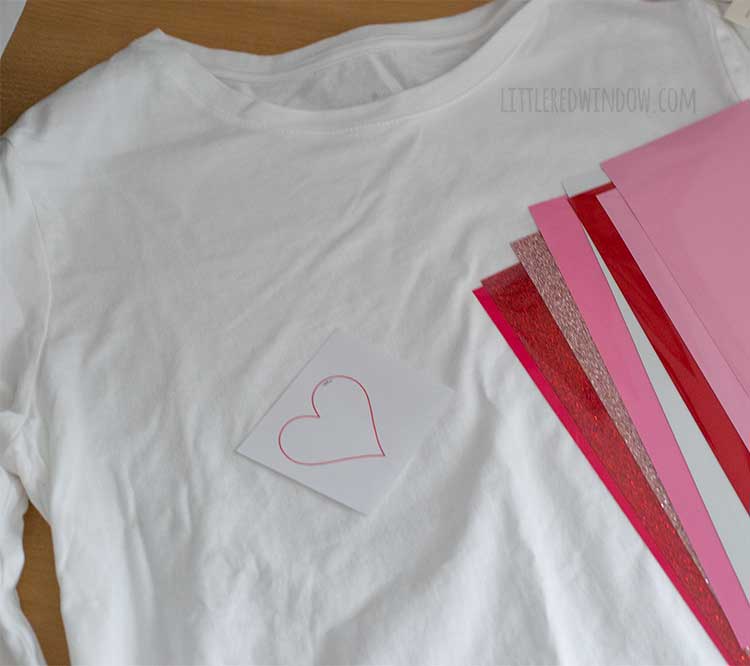
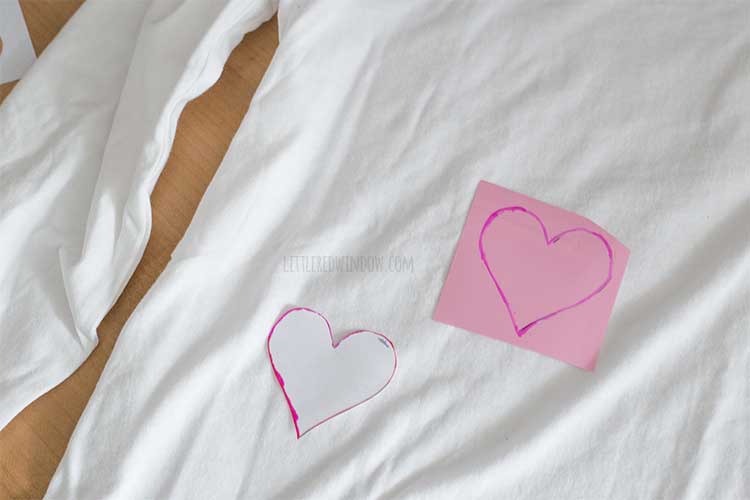
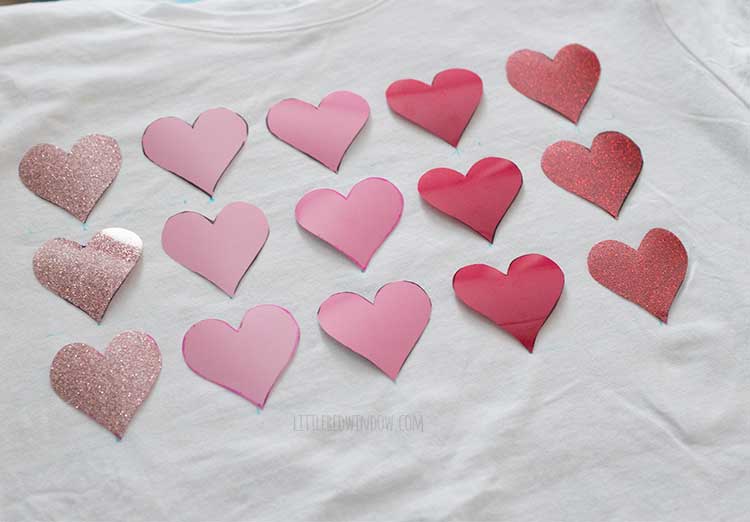
- Ok, step number one, either draw and heart shape or google “heart shape” find one you like, and print it out. Then cut your heart shape out, that’s your template.

- Use the paper heart shape to trace hearts onto the FRONT of you vinyl (MAKING SURE that your heat transfer vinyl does have a sheet of clear plastic film ontop of it). The clear film on heat tranfser vinyl protects the vinyl from your iron or heat press and keeps the vinyl from sticking to them. As long as your vinyl sheets have that clear film, you can trace with Sharpie right on the front because you can peel it off later. Do not trace your shape on the back of the vinyl, that will be permanent.

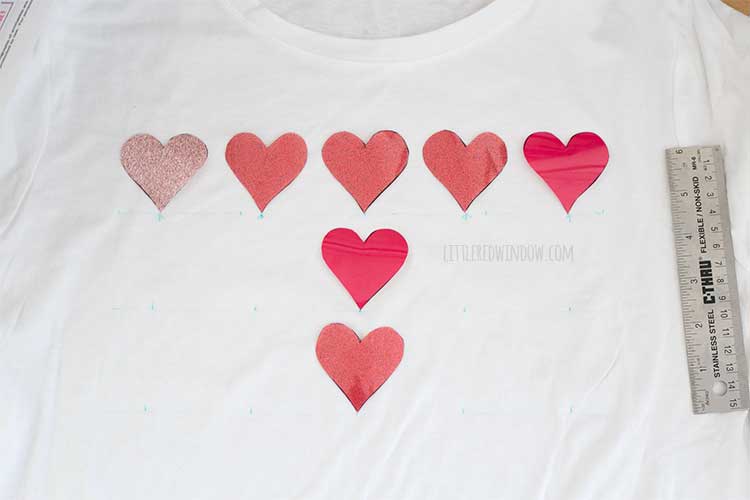
- Cut your heart shapes from the vinyl sheets with sharp scissors. Seriously, you don’t need a cutting machine for this!
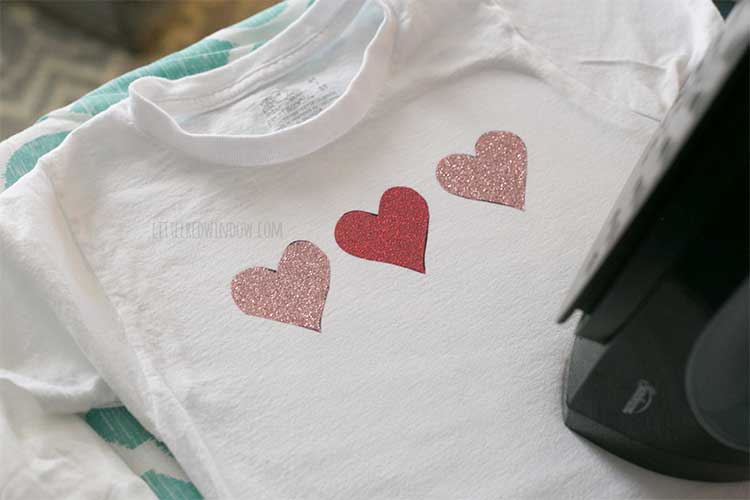
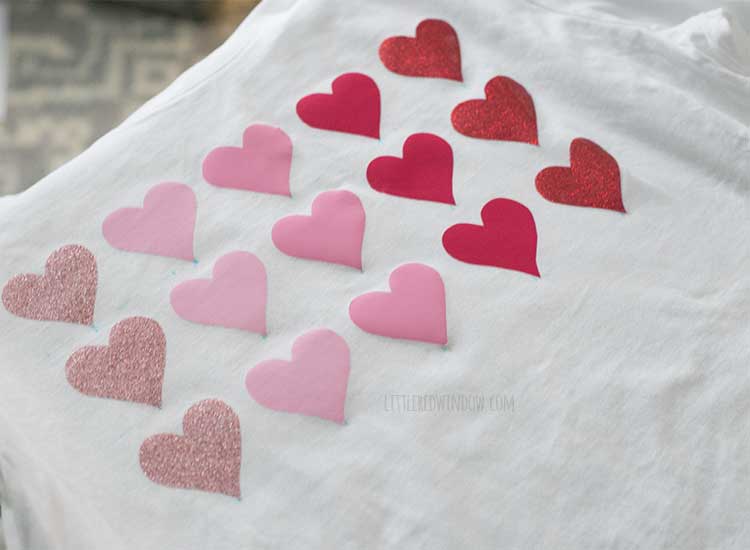
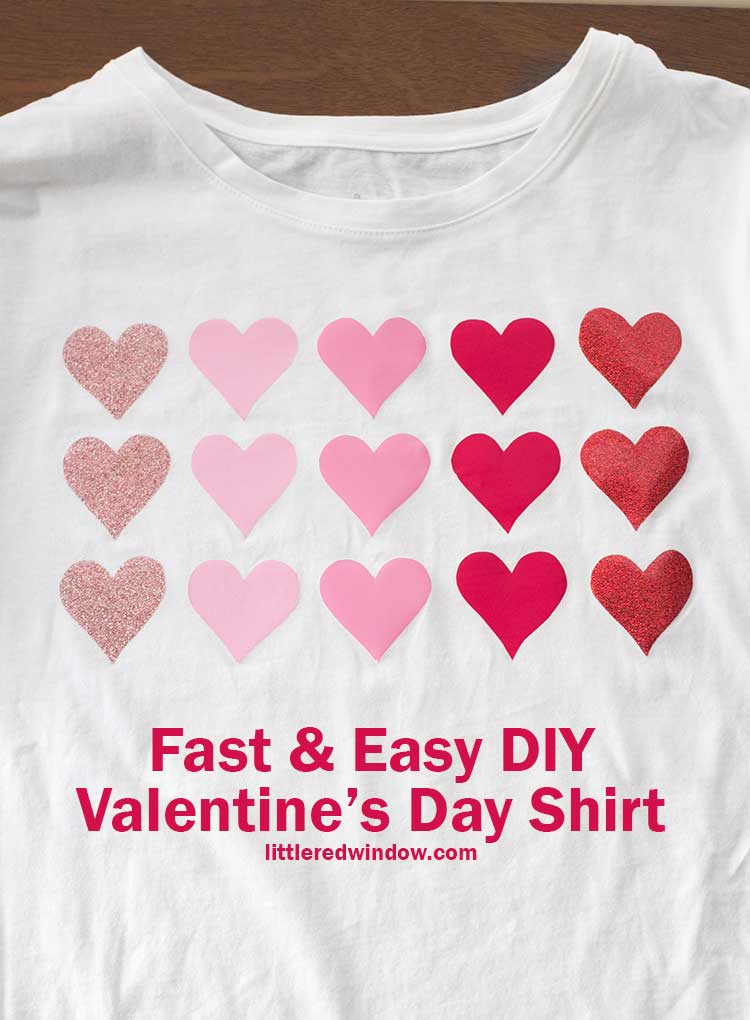
- Lay your shirt out on your ironing board and lay out the heart shapes the way you want them. Since I wanted a grid pattern, I did use a ruler and one of these disappearing ink fabric pens to mark where to place the hearts. But if you’re going for a more random pattern, you don’t have to do that at all! For the child size shirt that only have 3 heart shapes, I just eyeballed it.
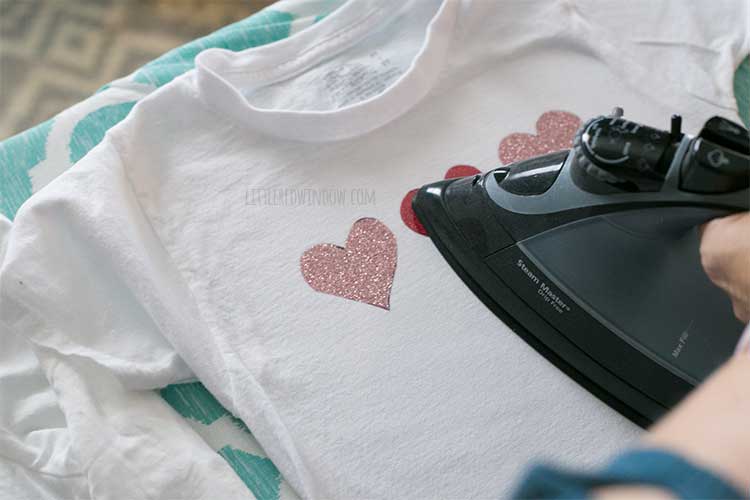
- Make sure you iron is fully preheated with the steam setting turned off. Then follow the directions for the vinyl you purchased to iron the heart shapes to the shirt. My vinyl called for 150 degrees and a certain number of seconds of heat. Be careful not to jostle the hearts when you set the iron down!
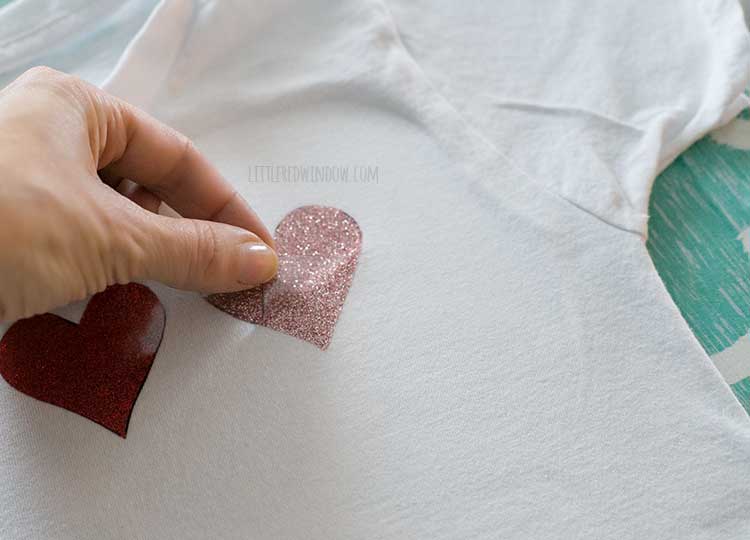
- Finally, follow the vinyl instructions for peeling off the clear protective layer. Mine worked best when I peeled while it was still warm but not how. However, two of the colors (medium pink and red glitter) were inexplicably a lot harder to peel than the others, so just be aware, there might be some variation in peel-ability and it might not be that you did anything wrong.


- That’s it! Follow the vinyl instructions again for washing and caring for your new DIY Valentine’s Day shirt!
If you liked this, you may also like some of my other posts…


- Crayon Scarf Knitting Pattern - July 21, 2026
- Pencil Scarf Knitting Pattern - July 7, 2026
- Tri-Color Linen Stitch Hat Knitting Pattern - June 22, 2026
Leave a Reply