Learn how to add stitches to your work, or cast on with this backward loop cast on video tutorial!

Ready to learn backward loop cast on? Let’s go!
The most common use for backward loop cast on is to add additional stitches to an in progress project. You might do this to add additional stitches at the end of a row, to add extra stitches to be used later for a thumb in a mitten, or in other situations where you need more stitches.
The other common use for backward loop cast on is for beginning knitters. I have a knitting friend who taught some learn-to-knit classes for kids, and this is the cast on she teaches them because it is by far the easiest.
But, whether you’re starting a new project or adding stitches later, the technique is the same!
While I can agree that it’s definitely easy, I have always found that knitting the first row AFTER a backward loop cast on can be difficult, the stitches can twist and stretch out and be hard to get your needle in to the correct way.
To me, it’s not worth the difficulty of the first row to use this cast on for the start of a project for a brand new knitter. But it’s really a matter of personal preference.
Either way, you still need to learn backward loop cast on for the other situations I talked about earlier, where you’re adding additional stitches to a work-in-progress.
Especially if you’re going to knit my Christmas Tree Hat knitting pattern, because you need backward loop cast on to make the cute little star on top!
Make sure to also watch the video to see how to do a backward loop cast on to add stitches to an existing project!
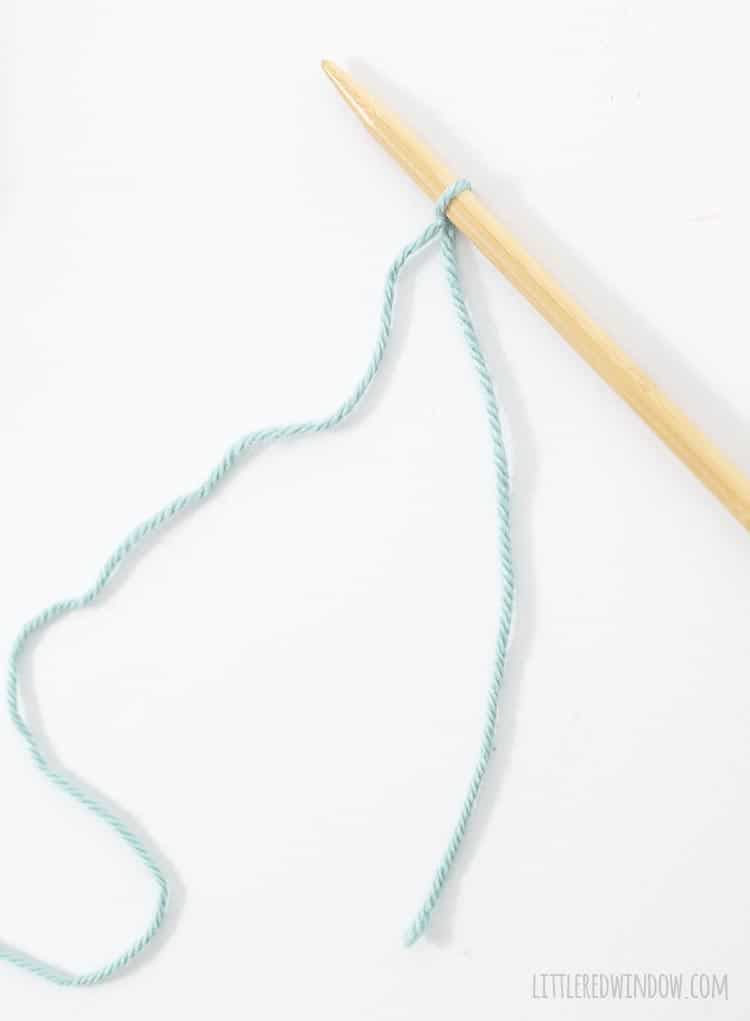
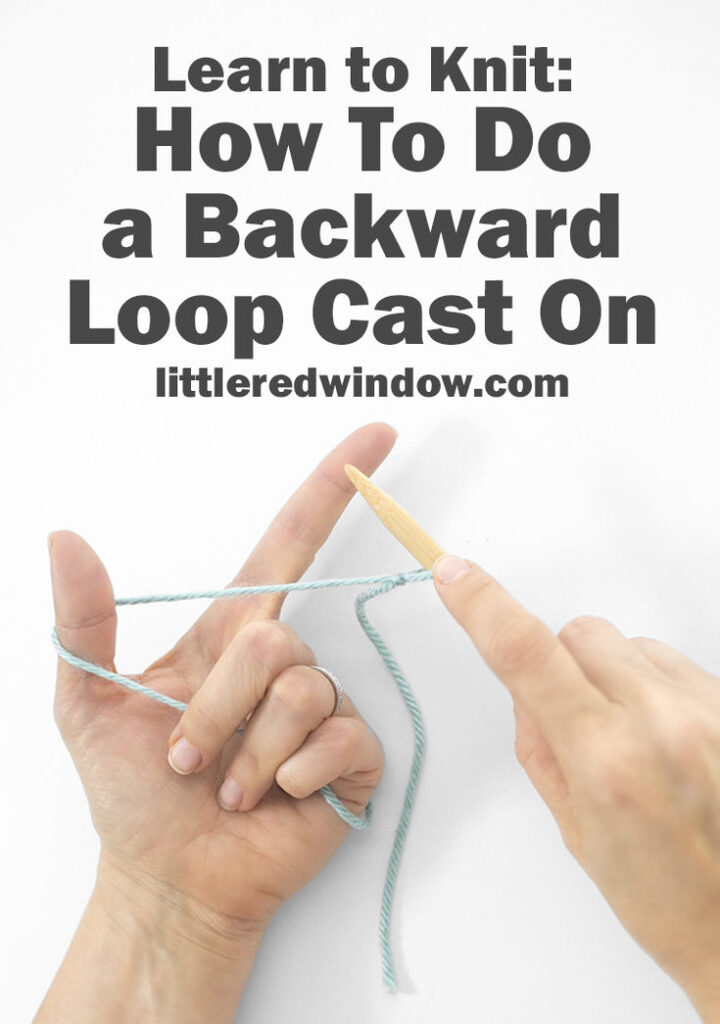
- Start with either existing stitches or a single slip knot on your right knitting needle

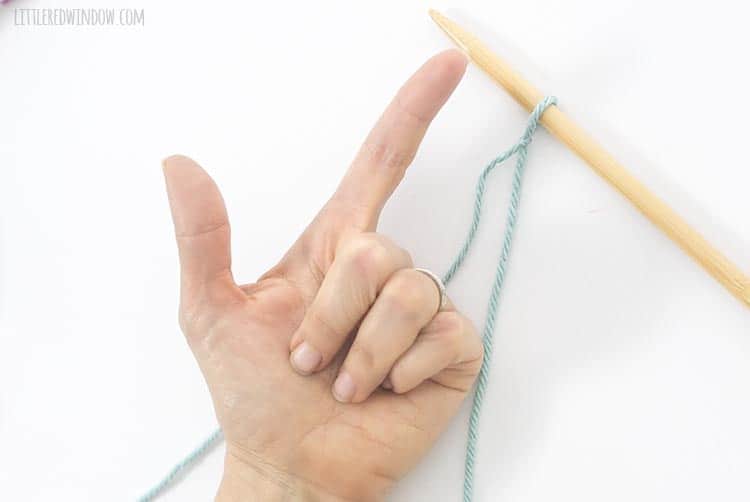
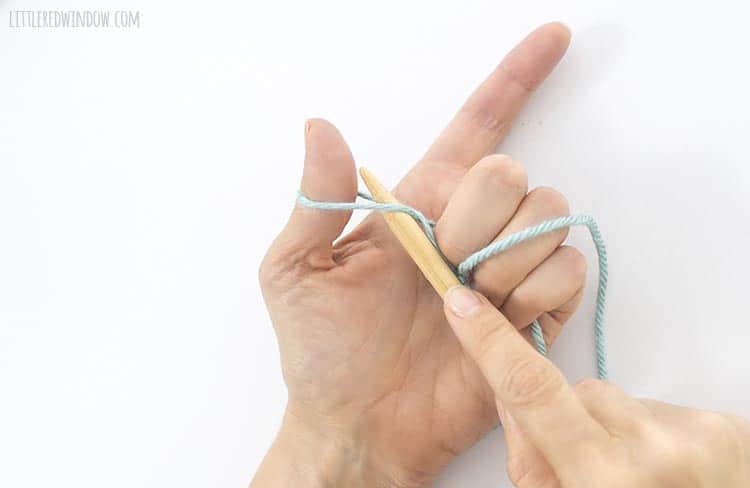
- Hold your left hand with your thumb and pointer out, hold the knitting needle with your right hand

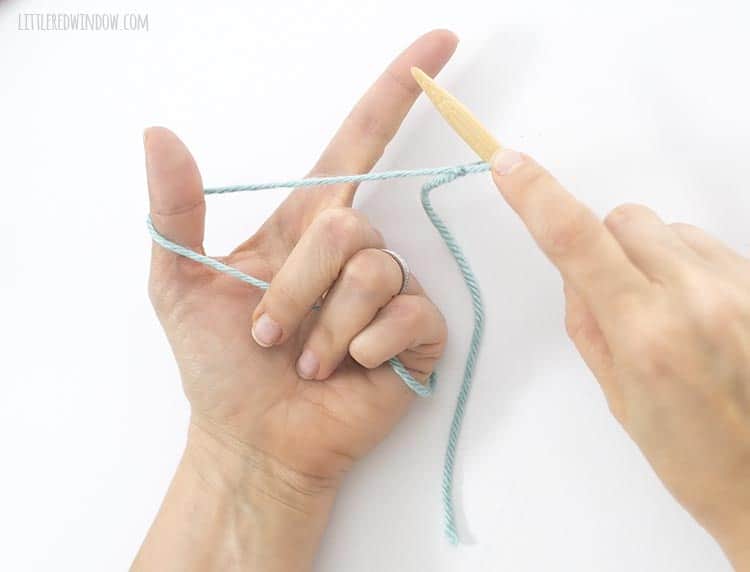
- Hold the yarn looped around your thumb as shown

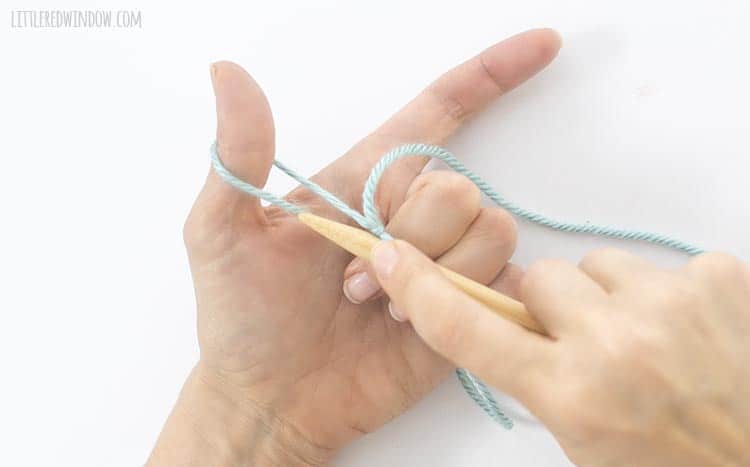
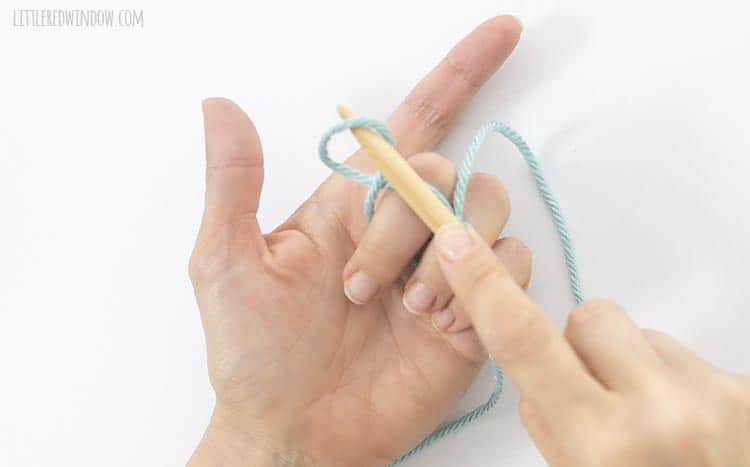
- Move the right knitting needle down below your thumb

- Then bring it up through the loop of yarn around your thumb

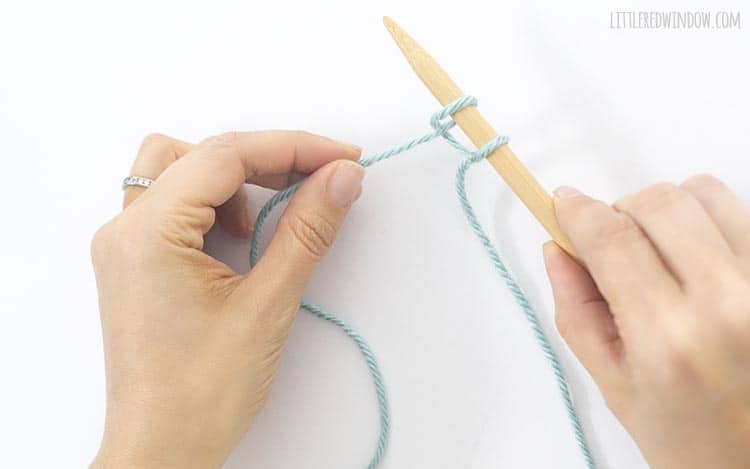
- Drop the loop from your thumb
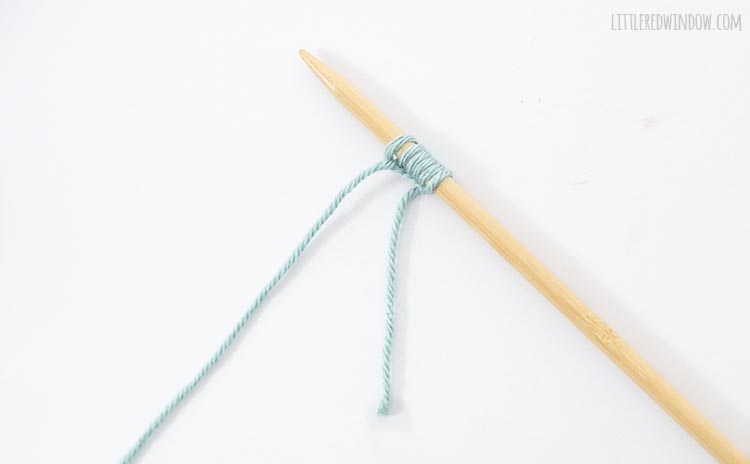
- Pull to tighten that stitch

- Repeat steps 2 – 7!

How To Do Backward Loop Cast On
Learn how to do a backward loop cast on. This easy cast on can be used to start a knitting project or it can be used to add additional stitches to the end of a row!
Materials
Tools
Instructions
- Start with either existing stitches or a single slip knot on your right knitting needle
- Hold your left hand with your thumb and pointer out, hold the knitting needle with your right hand
- Hold the yarn looped around your thumb as shown
- Move the right knitting needle down below your thumb
- Then bring it up through the loop of yarn around your thumb
- Drop the loop from your thumb
- Pull to tighten that stitch
- Repeat steps 2 - 7!
Notes
Watch the video to see how to use the backward loop cast on to add stitches to a row of knitting!
Recommended Products
As an Amazon Associate and member of other affiliate programs, I earn from qualifying purchases.
If you liked this, you may also like some of my other posts…


- Pencil Scarf Knitting Pattern - July 7, 2026
- Tri-Color Linen Stitch Hat Knitting Pattern - June 22, 2026
- Yummy Ice Cream Cone Hat Knitting Pattern - June 16, 2026
Leave a Reply