My Easy 3 seam Drawstring Gift Bag sewing tutorial is a perfect way to go green this Christmas!

About 6 or 7 years ago, I was at my parents house for Christmas as usual, we had just had a fun Christmas morning opening all our gifts and I looked over to where my dad was sitting. It’s usually his job to hold the trash bag and collect wrapping paper etc. I really do try my best to be green and eco friendly in life, and I felt a little sick when I saw how much wrapping paper we’d gone through as a whole family.
And, I mean, if you think about it, wrapping paper is kind of a weird concept anyway. You spend lots of money on something beautiful that you just rip and up and throw away?
Don’t get me wrong, yes, it’s fun to tear open a package. But I decided then and there that I was going to try and minimize the amount of wrapping paper I used personally in the future.

I certainly haven’t eliminated ALL wrapping paper. For example, every year we sponsor a foster child for Christmas and buy them presents. I wrap those in regular wrapping paper because I feel like in that situation, the wrapping paper is part of the fun.
Side note: I used to think I still needed to use fancy wrapping paper for anyone we needed to “impress” or who might not be into my crunchy environmental wrapping, but then we got one of Aa’s coworkers a new baby gift that was large and oddly sized (the best ever travel high chair) and didn’t have wrapping paper that fit.
So I whipped up a giant version of the easy 3 seam drawstring gift bag and she LOVED it. She ended up using it as a laundry hamper bag. She was honestly more excited about the bag than the high chair!
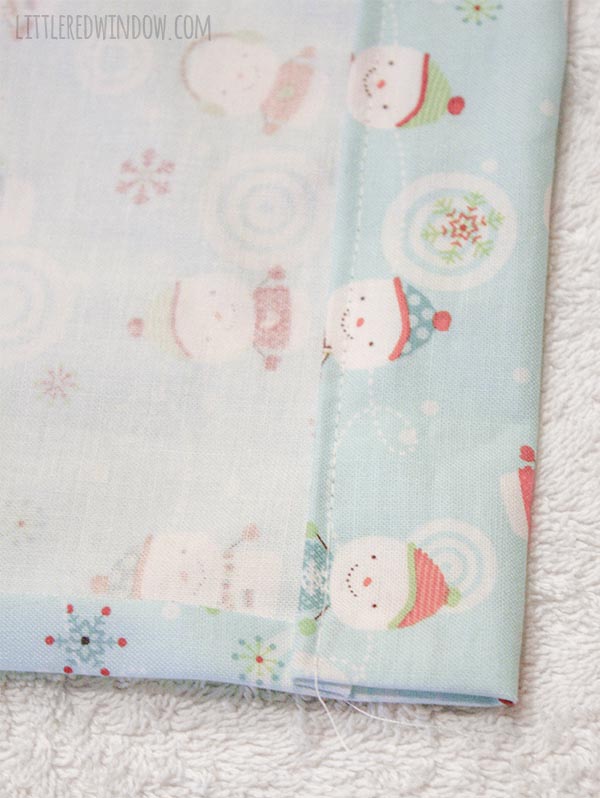
That’s the beauty of this pattern, it may be FAST, but it has nice neat seams inside so it looks very professional.
Anyway, about five years ago near Christmas I ordered some cute holiday fabric, invested a little time and energy up front and wrapped as many of my presents as possible in reusable wrapping.
But before I get to how I make them, you might be wondering, Cassie, do you really spend hours and hours sewing gift bags before every Christmas? Are you nuts?? Isn’t it kind of crazy to invest that much time and add ANOTHER thing to your holiday to-do list??
Why should I make reusable gift bags?
Well, in a surprising turn of events, these fabric gift bags have turned out not to be extra work at all, in fact, they SAVE me tons of time!
At the start of the Christmas morning un-wrapping frenzy I just say to my loved ones, “If you think you will reuse them, please feel free to keep your fabric gift bags, otherwise, just hand them over to me and I’ll use them again next year!” And guess what! 99% of the time they get handed back to me! So at this point I have a big stash in a variety of sizes that I can reuse year after year!
And the best part is, when it’s time to wrap presents I just pop things in a bag, add a tag, tie the ribbon in a bow and I’m done! No scissors, no scotch tape, no unruly wrapping paper. I think it’s cut my yearly gift wrapping time and effort by 75%!
And if I end up with a gift for someone that doesn’t fit in one of the sizes that I already have, I have gotten it down to a super easy 3 seam drawstring gift bag science! I can whip one of these out in 10 minutes or less! So anyway, enough wordiness, on to the tutorial!
Easy 3 Seam Drawstring Gift Bag Supply List
Fabric (cotton quilting fabric works great but you could branch and out and try burlap or velvet or whatever you want!)
Iron and ironing board
Satin or grosgrain Christmas ribbon (between 1/2 inch and 3/4 inches wide will work)
Easy 3 Seam Drawstring Gift Bag Instructions
1. First cut a rectangle of fabric for your gift bag. To figure out what size your rectangle should be, measure the item you’re putting in it. The width of the rectangle should be the width of the item + about 3 inches. Less if it’s something thin like a cd and more if it’s something thick like a book. The height of your rectangle should be twice the height of the item + about 5 – 6 inches.
width = width of item + about 3 inches, this is referred to as the top of the bag
height = (height of item x 2) + about 5-6 inches, this is referred to as the side of the bag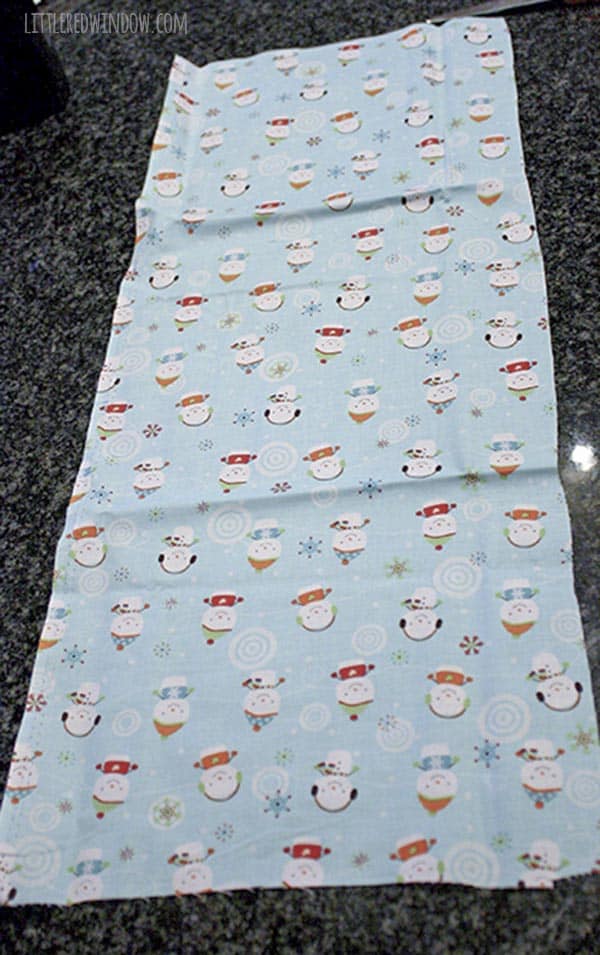
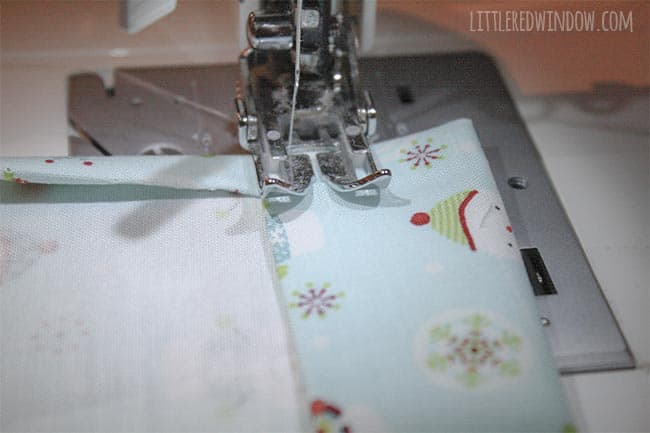
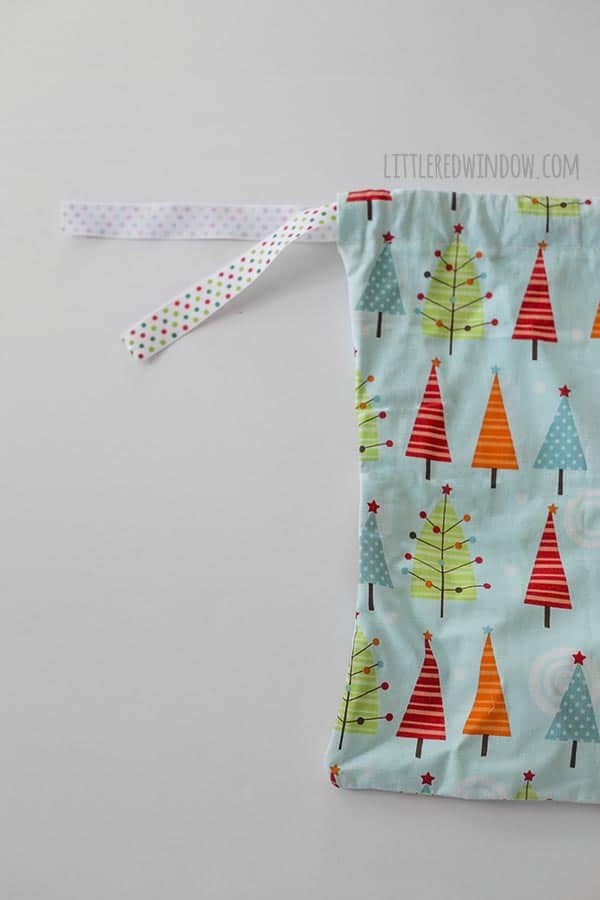
2. The key to these drawstring gift bags is a little prep. Lay your fabric right side down and start by folding over one long side by 1/4 inch and pressing with your iron. Then fold that same side over again another 1/4 inch and press again so the raw edge is hidden. Repeat with the other long side. These long edges will be the sides of the bag.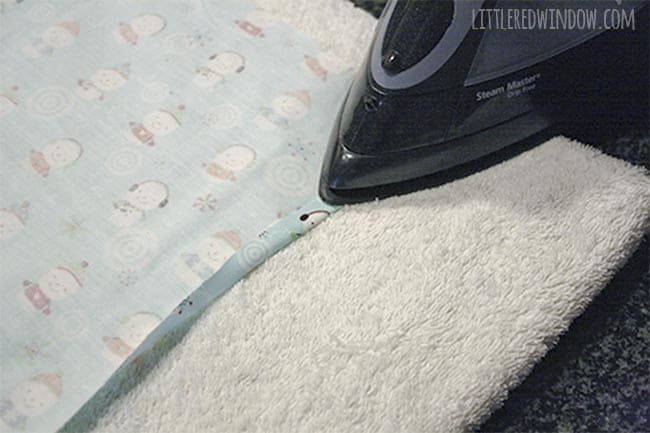
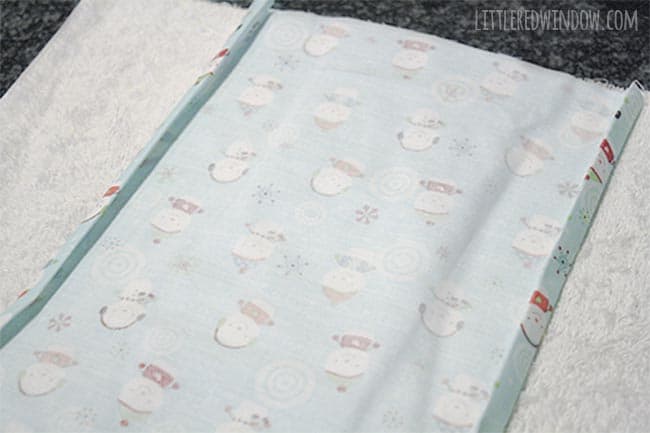
3. Next fold over one top edge by 1/4 inch and press.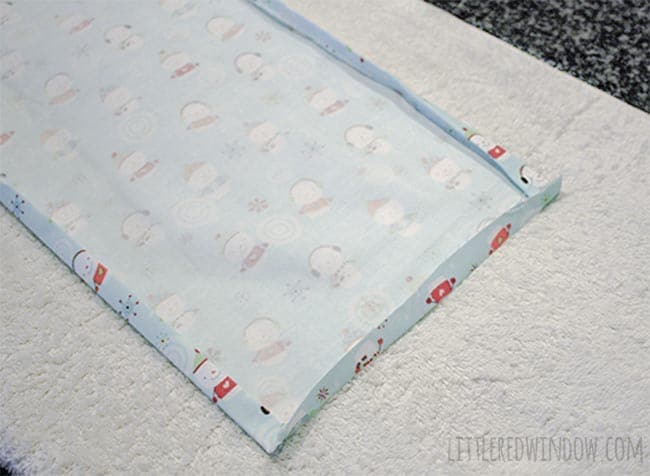
4. Then fold over that same top edge again by another 1 1/2 inches, press, and pin. This will form the casing for the drawstring ribbon. Repeat steps 3 & 4 with the other top edge.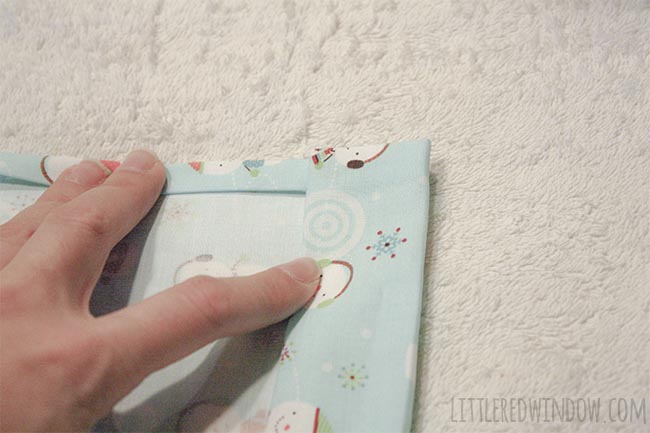
6. Fold your bag, right sides together, matching up your top edge casings, and pin.
7. With a 1/4 inch seam, start just below one casing, sew down the side of the bag, across the bottom and back up the other side, stopping at the stitching just below the bottom of the casing on the other side as shown in the photo below. 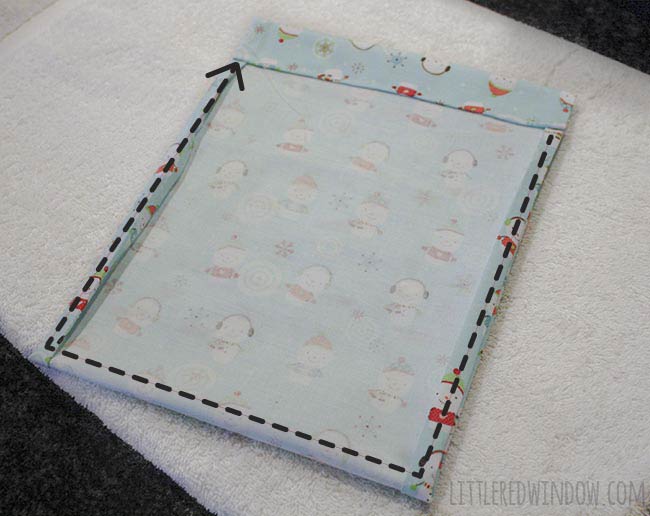
Note: Obviously, because it’s folded over, stitching across the bottom of the bag is not really necessary but I find that not starting and stopping and backstitching and trimming to do each side separately saves just a little bit of extra time that adds up when you’re making a whole bunch of bags. It’s worth it!
8. Turn your bag right side out. Cut a ribbon that is 2x the width of the finished bag + 6 inches. Dab a little fray check sewing glue on the ends of your ribbons so they don’t unravel. (If you don’t have that, regular craft glue would work too)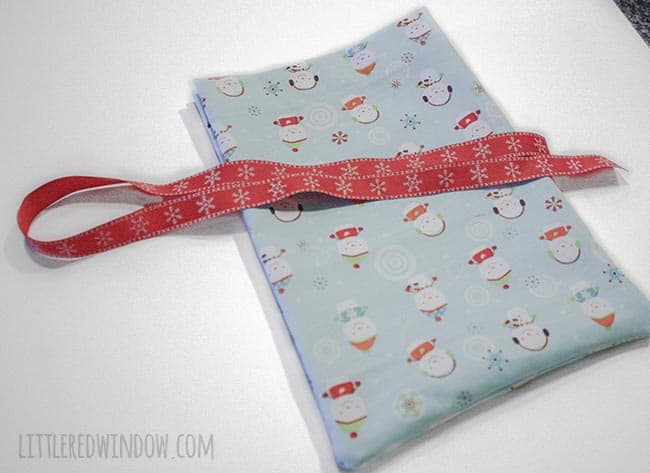
9. Put a safety pin through one end of the ribbon and use it to thread your ribbon through the ribbon casing of the bag.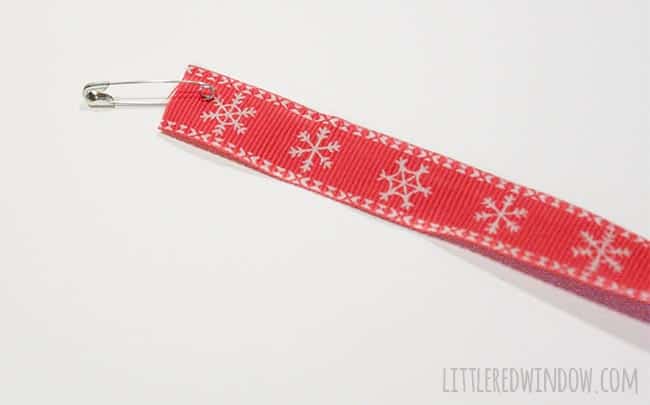
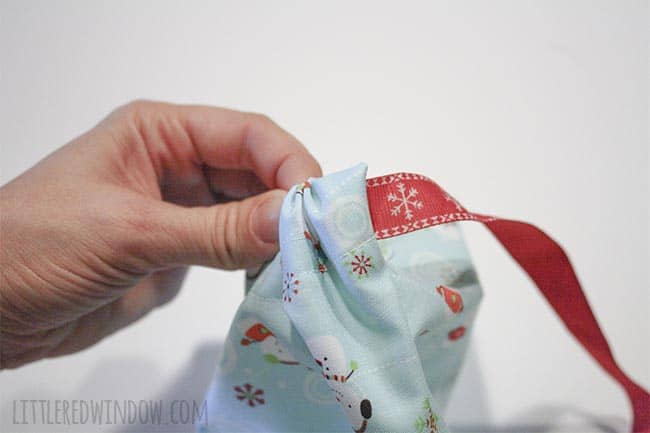
When you get to the other side from where you started, just reinsert the ribbon into the next side of the casing and continue around the bag until you’re back where you started. Remove the safety pin.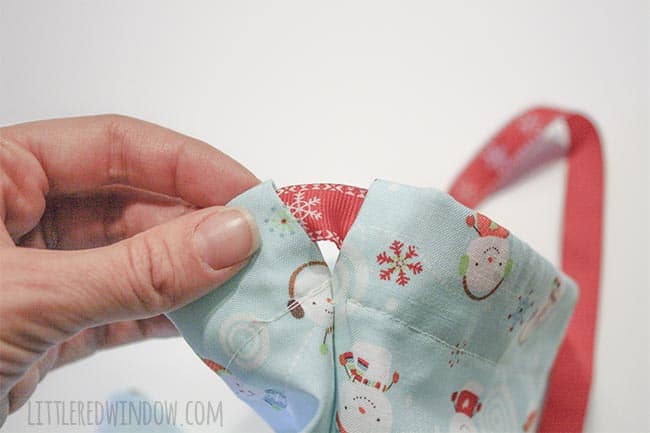
10. Add a present, a gift tag, and tie up your bag and you’re all done!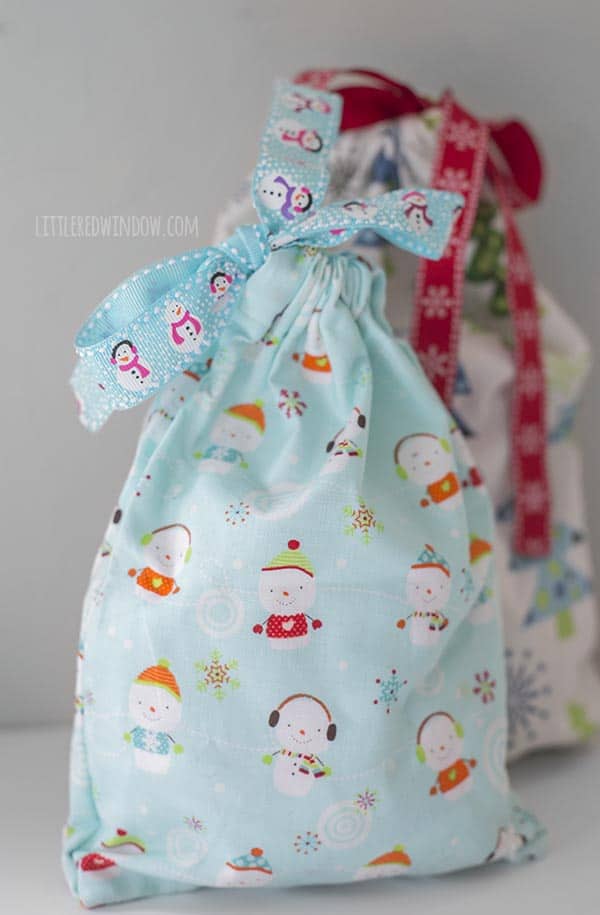
If you liked this, you may also like some of my other posts…


- Crayon Scarf Knitting Pattern - July 21, 2026
- Pencil Scarf Knitting Pattern - July 7, 2026
- Tri-Color Linen Stitch Hat Knitting Pattern - June 22, 2026
Judy says
Pi love the bags, thanks
Wendy Hawkin says
This is wonderful. I want to make them to fit a series of my 6″ x 9″ books (4″ with all books) and put cardboard in the bottom to stabilize. Do you have any tips?
Cassie May says
That’s a great idea, I haven’t tried that, but let me know if you find a method that works!
Nida naveed says
I’m a teacher.. and I found a simple sewing activity for grade 5 deaf students.. this is great idea.. thanks . Jazak Allah
Cassie May says
Thank you so much!
Riya Sen says
This is a great idea for a gift!
Christine says
Brilliant! The easiest pattern I have ever found. Thank you.
Bonnette Nancy says
I love this bag and the techniques you used to make it.
Is this pattern in a book or somewhere I can print it or save to my computer.
This is the best pattern
Hannah says
Thank you for this lovely tutorial! Really easy to follow – I’ve already made two little bags and I’ll be making more from the stash of Christmas fabric that I’ve been building up over the years!
Crafter Craze says
I’m late at finding this but now I have plenty of time to start sewing these for next Christmas if I can find fabric that is on clearance. If not, then I’ll wait until sales in July start again. I’m thinking that instead of ribbon that I might crochet a drawstring because it is cheaper.
Coni Schelnick says
Hello, I found your adorable bag tutorial tonight and have already made three! Thank you for this amazing inspiration! I used my Cricut to add some glitter snowflakes….my three grands are going to love them almost as much as the large bottles of bubbles they will find inside! Happy Holidays!
Bev says
I was just looking for measurements for a drawstring casing for a gift bag I have mentally created, very similar to what you have here. One question, though: If saving time is important when you’re whipping out a ton of these (as it is for me), why waste all that time ironing? I was planning to sew a French seam around the bottom three sides of the bag (1/4″ seam fabric WST, then turn inside out, finger press, and sew another seam with a 1/2″ SA , make your drawstring/ribbon casing, turn the bag right side out and you’re done. French seams are so much less time consuming than all that ironing!
Tracy Herzog says
Hi
Thank you for sharing your tutorial. I do not sew. Early beginner. Over the pandemic, I taught myself via videos on how to use my machine to make masks. Did well. I was wondering if it were possible for me to add another drawstring so I could use your pattern. I’m trying to make pretty pouches to carry Gems and crystals. Do you think you could direct me as to creating an opening on both sides without getting too involved. Look forward to hearing from you.
Thank you,
Tracy Herzog
Bev M. says
That is really easy. Her instructions already call for openings on either side of the bag. You just need two ribbons instead of one. String your first ribbon through as instructed on one side of the bag then again on the opposite side. After you thread the first ribbon, pin both ends to the bag to prevent accidentally pulling it out. (Ask me how I know to do this.) Then start threading on the opposite side just like you did for the first ribbon.
Rachel says
I LOVE this! Im always looking for ways to cut down waste, especially around the holidays. It’s a bit late for me to make a bunch of bags for this Christmas but I definitely will be doing this next year!
Sarah says
Did you set these under the tree before Christmas? I’m trying to figure out how to keep my kids from peaking.
Cassie May says
Hi! In my house we don’t put any presents out before Christmas Eve, so I haven’t had this problem. If I did though, I might consider securing the knot with a little zip tie? You could cut all the zip ties off after they go to sleep. That should keep them out, lol!
Becca says
Thanks for sharing this again- I used quite a large directional print so cut it with a double width instead of double length, and just had one opening where the drawstring comes out. So quick and it still looks great!
Cassie May says
great! I love that idea, So glad it worked for you! Isn’t it just so easy?!
mary sanderson says
Thank you so much for the best gift bag tutorial on the web – I must have googled them all ! I wanted a simple way to construct an unlined bag with the casing sewn first, so much easier that way.I need to make several for school fundraising, in a hurry…..
Cassie May says
oh good, I’m so glad you like it! Thank you!!
Kristie says
This is fantastic! I have been looking for a drawstring bag tutorial that took the top side seams (where the drawstring is) into account and wasn’t terribly cumbersome in creating. Other tutorials have you do an extra few steps to sew down the seam on top (sides) – where you take that into account in the beginning, YAY!! I have been wanting to make drawstring bags for handmade soaps (eco-friendly packaging), and this is how I’ll be making them. Oh, and bonus, Christmas is in about a month and some change, so I will have plenty of time to get started on some Christmas gift bags of my own. I really don’t like wrapping presents (time and $$$), so this looks to be a great remedy to that. Thank you!!
Cassie May says
Oh good, I’m so glad you found my tutorial! I had the exact same motivation when I was figuring out how to make them. I knew if I was going to make a whole bunch it needed to be absolutely as simple as possible! I’d love to see a pic of yours when you’re done! 🙂
Cassie May says
Thanks for your great comment!
Shirley S says
Thanks for the great, instructive tutorial. I just sewed one: I love it. I’ve been searching for a tutorial that was simple!
Cassandra May says
oh good! So glad you liked it!
Missy Homemaker says
Such a smart solution to gift wrapping. I like how the bag can be reused for gifts or for other things as well. You’re being featured on the Family Friday Link-up this week. Thank you for sharing!
Cassandra May says
Awesome! Thanks!!
Rebecca says
Thank you for this! I’m using your tutorial to show my daughter how to sew. She’s just learning!
Bismah says
I really like this! You shared a wonderful tutorial on here. The best part is that this bag can be reusable for so many things.
Linking up from “Family Fridays”.
Have a great day 🙂
Erin says
Love your post on these! I bought fabric and ribbon on clearance after Christmas last year but never sewed them up. You make it too easy for me not to just do it. Thanks!
Linda says
Thank you for this tutorial, it is very helpful not just in cutting down on waste but those hard to wrap, ackward shaped gifts.