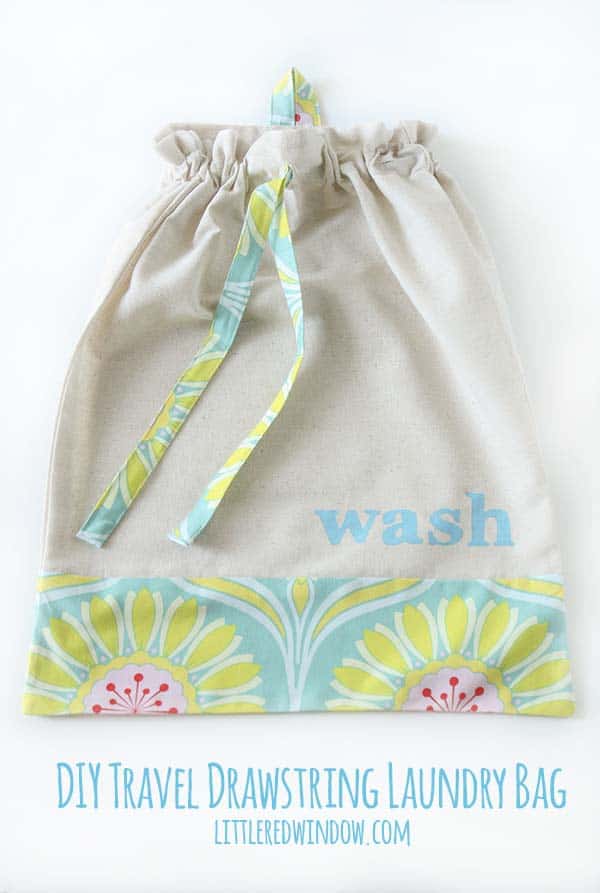
Sew yourself a cute DIY drawstring travel laundry bag and keep your suitcase organized on your next trip!
I have always loved traveling but HATED living out of a suitcase. You know how everything gets all jumbled up and the dirty clothes live next to the clean ones and the next thing you know, you’re sniffing socks to see if you’ve worn them? Tell me that happens to other people?
When Aa travels for work, he stays at the kinds of places where you send your laundry out and they return it later that day with each individual pair of underwear wrapped in plastic and your shirts dry cleaned, pressed and hung.
But in real life, like normal people, we’re usually in a regular, not-the-cheapest-on-travelocity-but-almost, hotel. And so when Aa suggested I started using the plastic laundry bags that even cheap hotels usually have in the closet to corral some of my suitcase mess, it was kind of a revelation!
I mean really, duh, right?! But it made things so much easier! Of course I kind of hated the plastic bags.
For one, I’m generally, in life, trying to do my best to use as little plastic as I can. But also, for a long trip they’re never big enough and they were usually pretty flimsy.
So before we went to California for a little winter sanity vacation, I thought, why don’t I make myself a nicer travel laundry bag!
This Drawstring Laundry Bag is a step up from Easy 3 Seam Drawstring Bag and I did do a little extra work to make it pretty, but if you want a really really simple version, that’s a great tutorial.
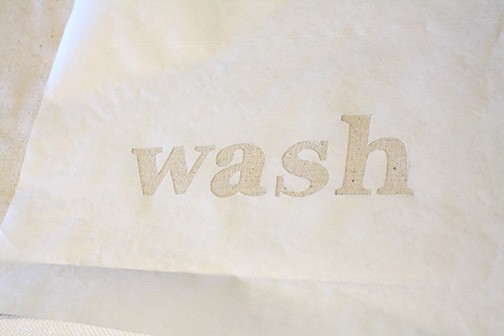
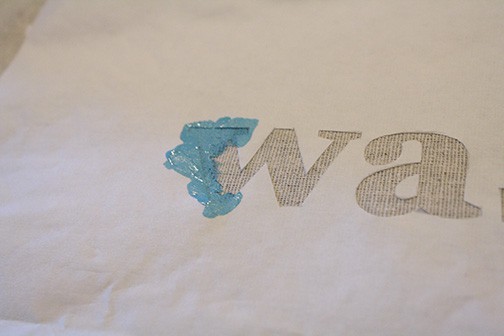
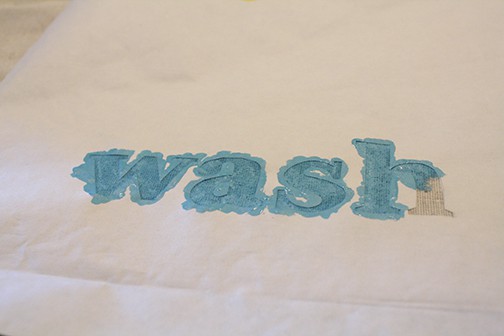
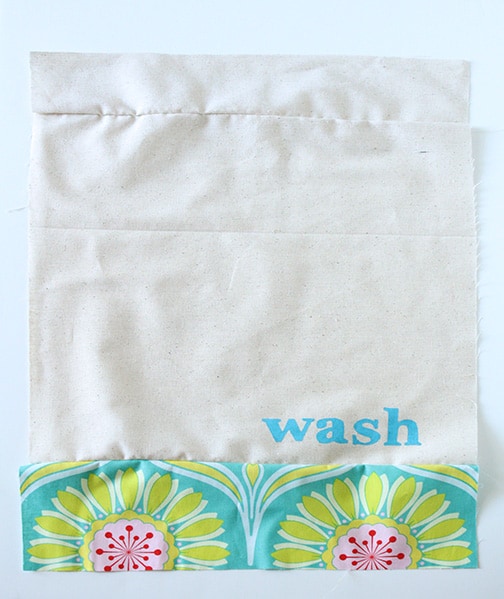
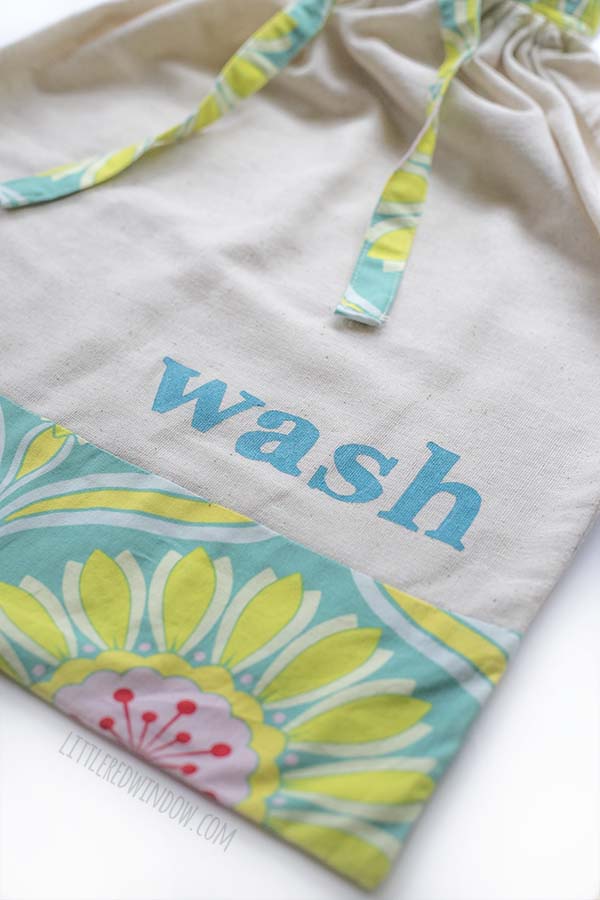
This drawstring travel laundry bag combines some pretty fabric and one of my favorite techniques, freezer paper stenciling (which, if you’ve never done it before, is really easy)!
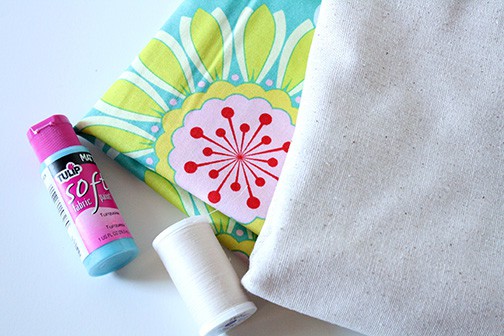
Drawstring Travel Laundry Bag Supply List
About 1/2 yard main fabric (fabric A, in my bag it’s the tan)
About 1/4 yard accent fabric (fabric B, in my bag it’s the patterned fabric)
2″ x 2″ scrap of fusible interfacing![]()
Matching Thread
DIY Drawstring Travel Laundry Bag Instructions:
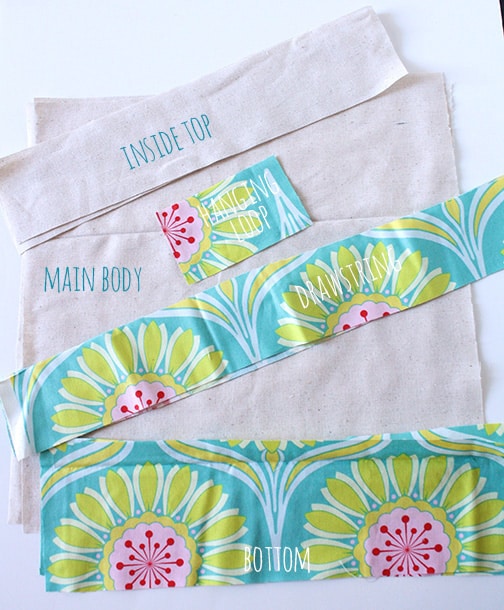
1.First, cut your fabrics:
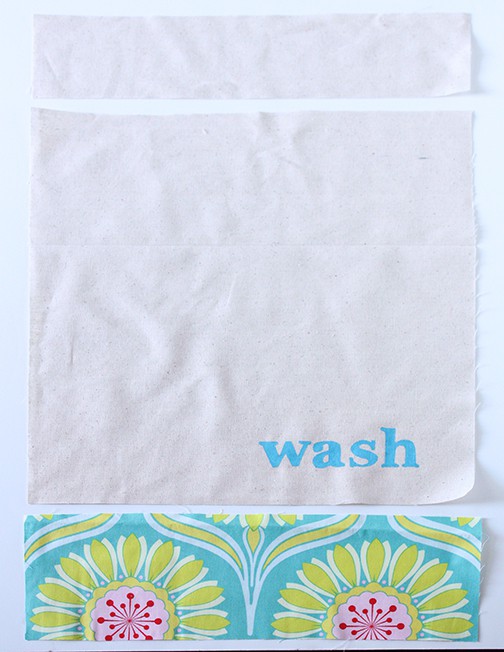
Cut 2: 16″ x 16″ from main fabric A, this is the main part of the bag
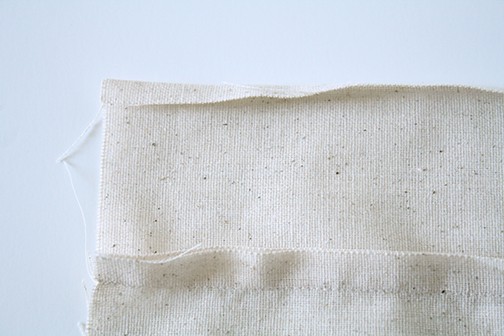
Cut 2: 16″ x 3 1/2″ from main fabric A, this is the inside top of the bag
Cut 2: 16″ x 5″ from accent fabric B, this is the bottom of the bag
Cut 1: 45″ x 3″ from accent fabric B, this is the drawstring
Cut 1: 3″ x 5″ from accent fabric B, this is the hanging loop
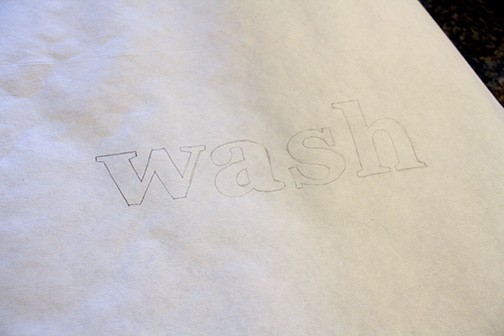
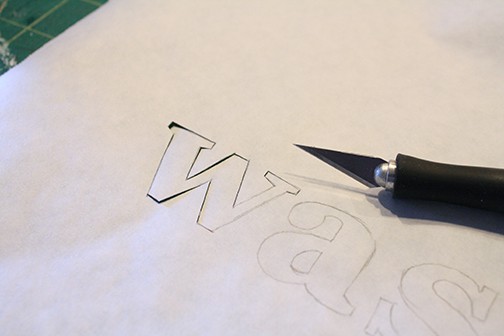
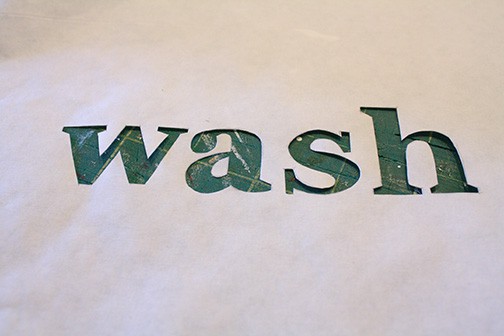
Using a medium setting and no steam, carefully press the stencil with an iron to adhere it. Be especially careful with small pointy ends and try not to rub with the iron. Don’t forget the center of the A!
Now it’s time for sewing!
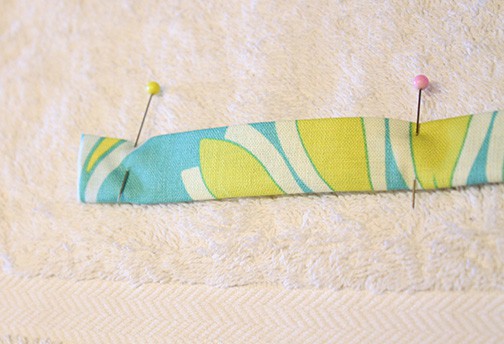
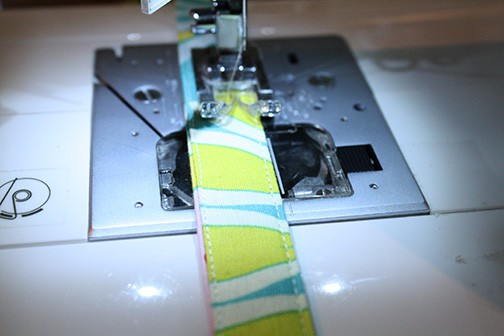
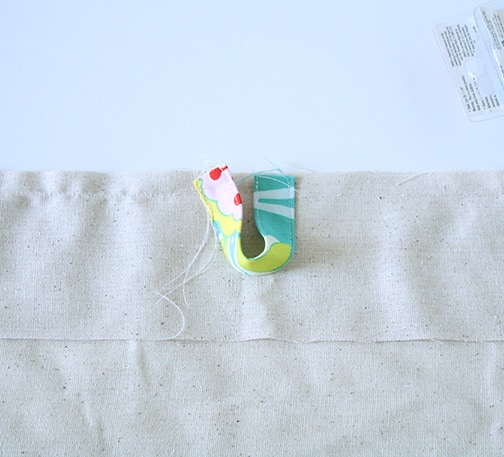
3. First we’ll make the hanging loop and drawstring. Lay out the small rectangle you cut for the hanging loop.

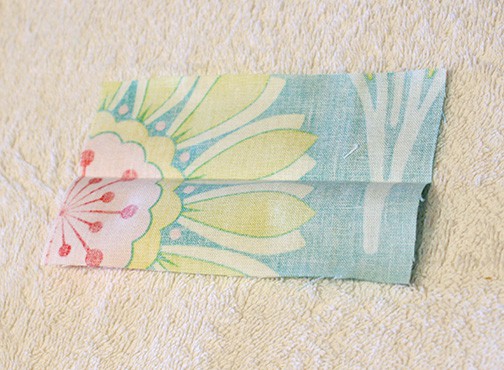
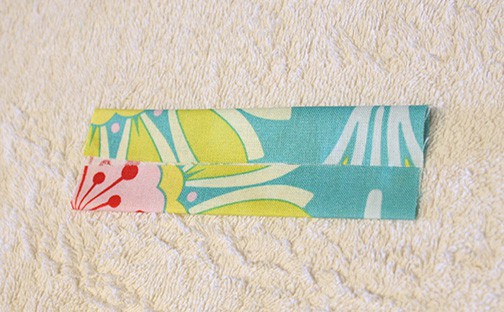
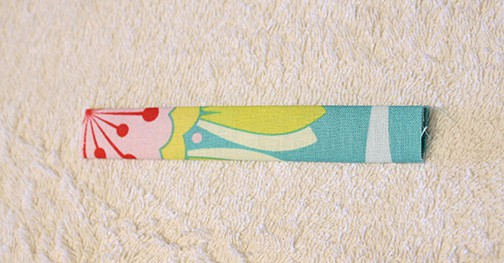
You will topstitch along both long edges of the fabric.
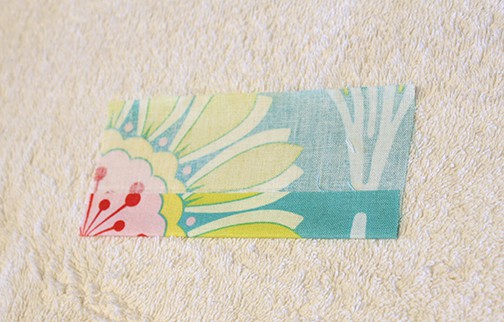
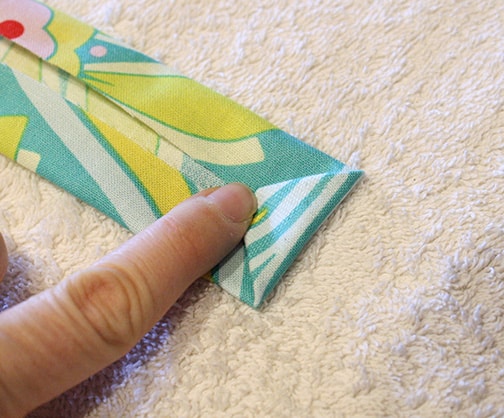
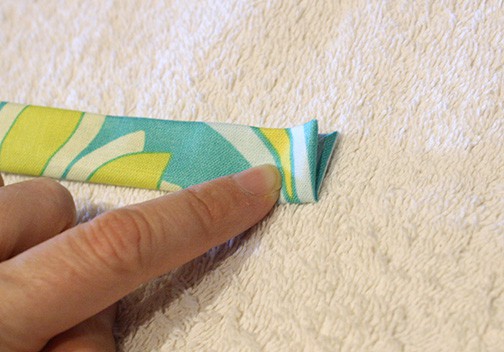
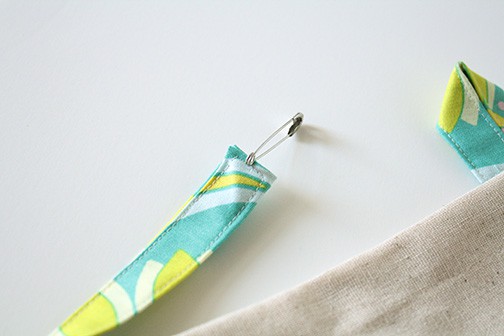
4. To make the drawstring, follow the exact same procedure that you did for the hanging loop. The only difference is that, for the drawstring, you need to finish the ends because they will be exposed. To do that, after completing all of the folding and pressing steps above, unfold one end slightly and then fold each outer corner down and in toward the middle.

Next we can assemble the main part of the bag.
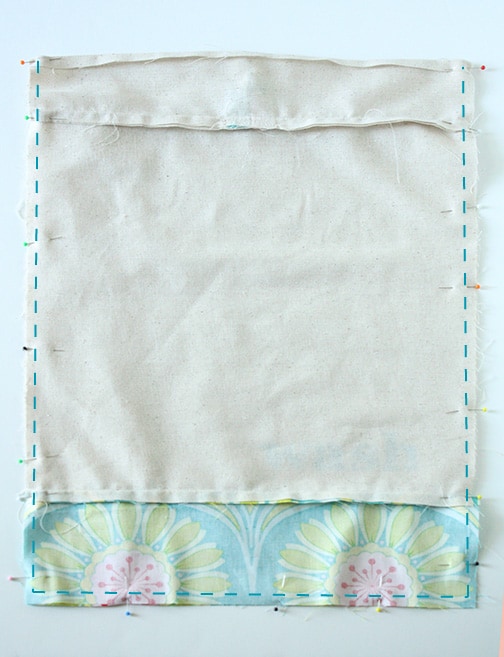
5. First take the main body piece that you stenciled, one of the bottom accent pieces and one of the inner top pieces. Lay them out like this:
Take the bottom piece and the inner top piece and flip them over so they lay on top of the main body piece, right sides together, and pin. Stitch along those seams with a 1/2″ seam allowance.
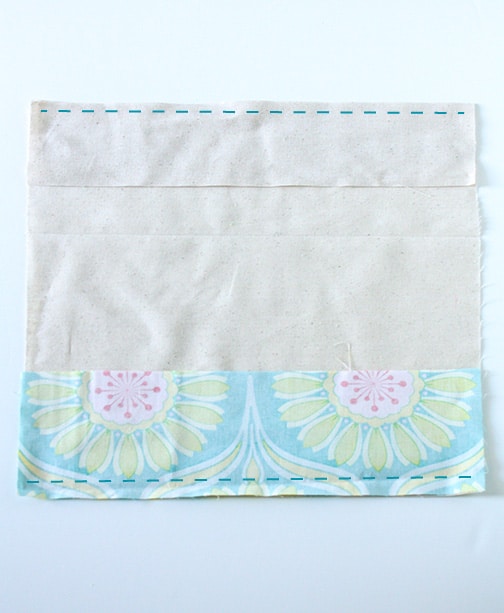
The inner top piece will fold down inside the bag to form the drawstring casing.
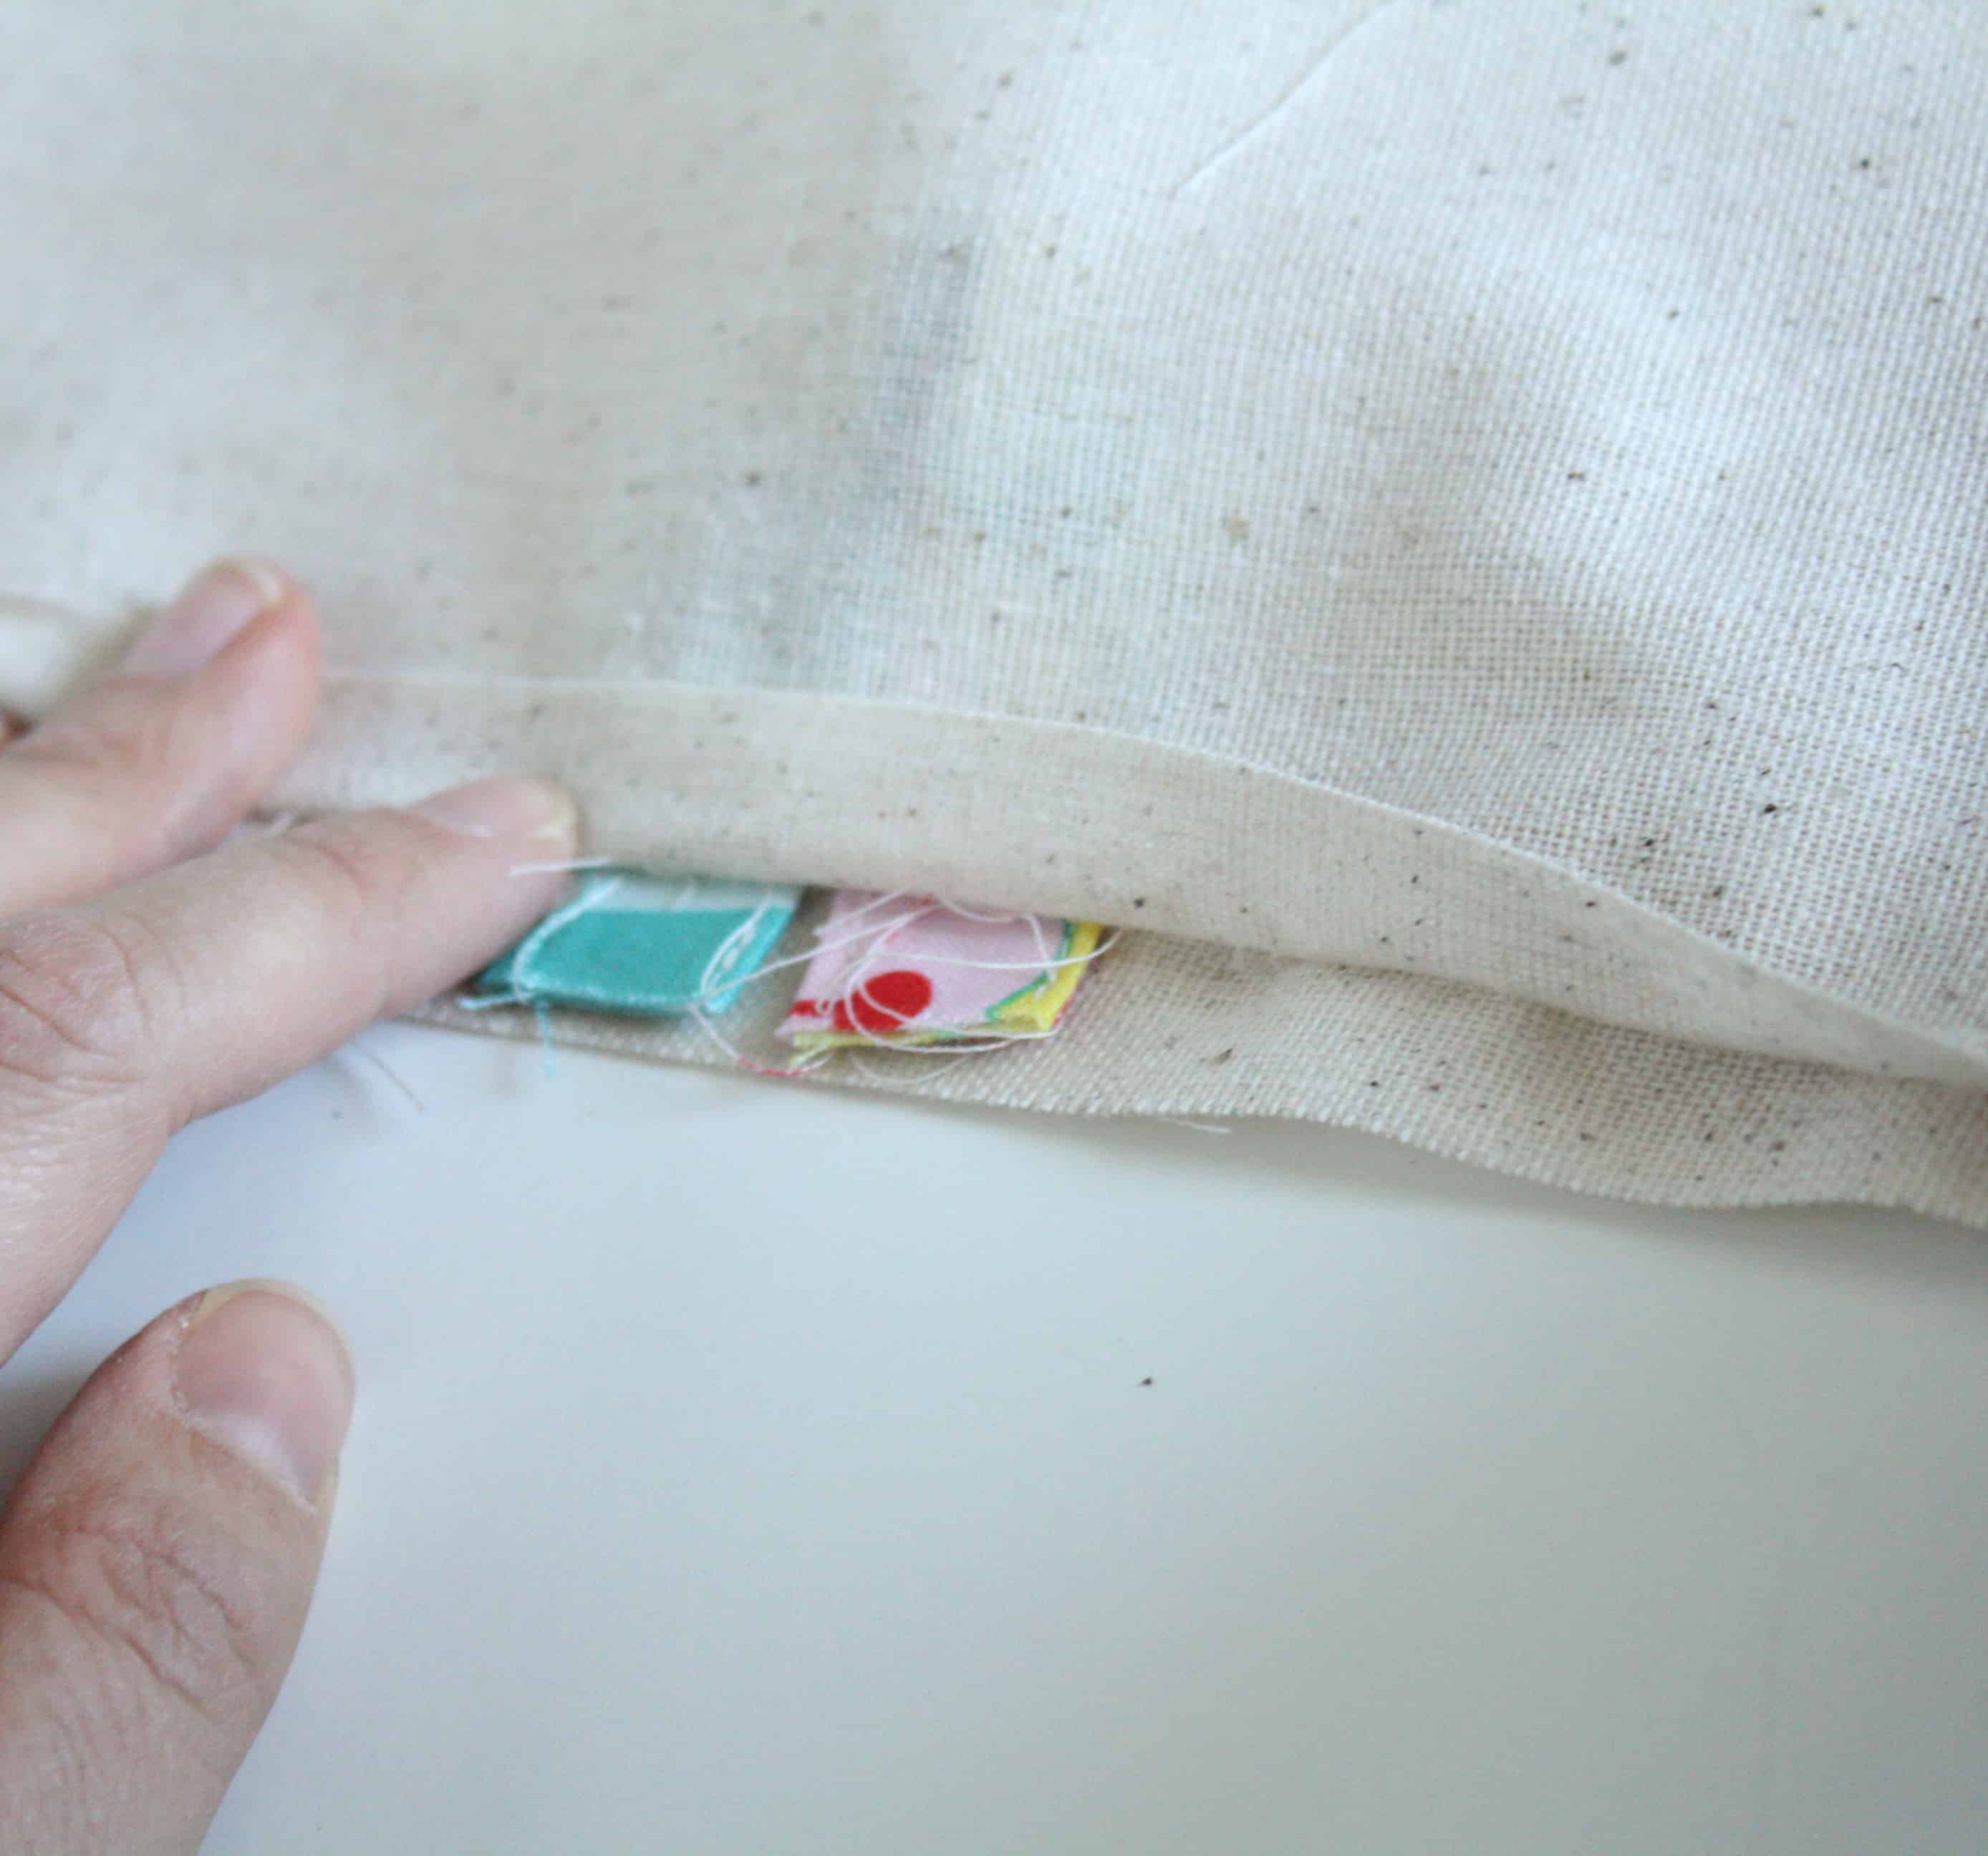
6. Next repeat step 5 with the back main body piece and the remaining bottom and inner top piece. Before you sew the top seam, take a moment to insert the drawstring loop. It will go between the main body piece and the inner top piece, facing in. Lay it out like this:
And then insert between the right sides of the fabrics and pin:
When you open up the back of the bag, it will look like this:
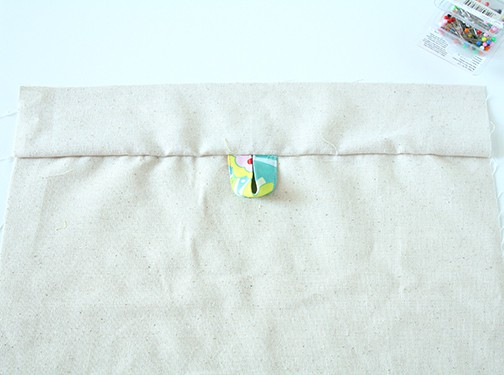
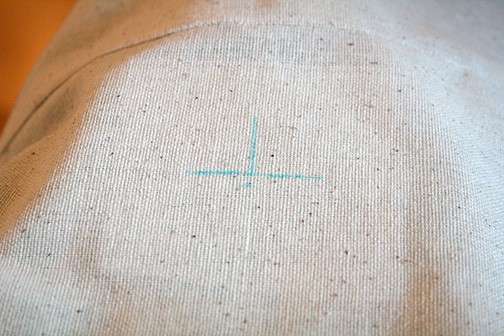
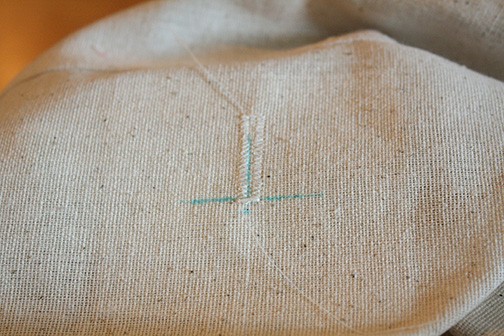
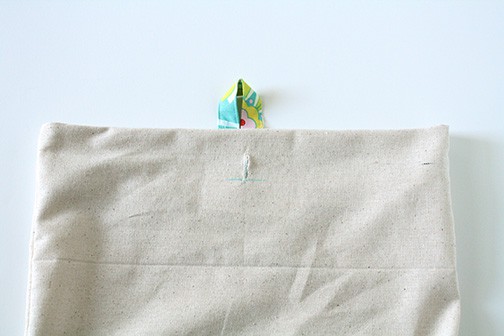
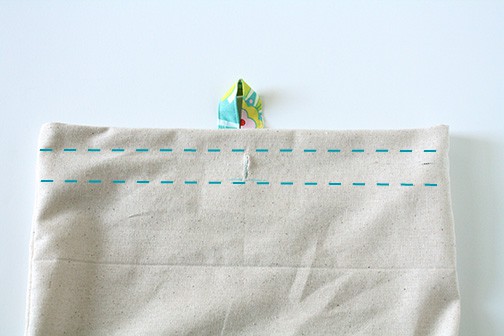
7. Next we need to make the buttonhole for the drawstring. On the front of your bag, measure and mark where you want the buttonhole to go using a disappearing ink fabric pen. I placed mine in the center of the bag, 2 inches down from the inner top fabric seam.
Then following the instructions that came with your sewing machine, use a buttonhole foot to make a 1″ buttonhole. (Want to know a secret? I used to think buttonholes were super scary. Like I’ve been sewing for 10+ years and I never really made one until recently. I was terrified of screwing it up and having to start a project over.
But you know what, I was worried for nothing. It’s super easy. A thousand times easier than inserting a zipper, for example. So if you’ve never done it, try! I promise, you can do it! )
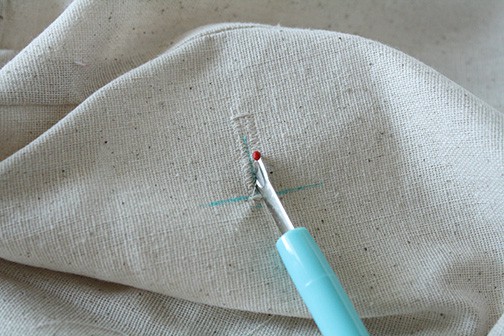
Use your seam ripper to open the buttonhole.
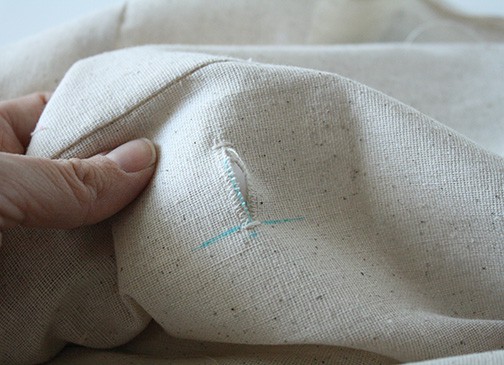
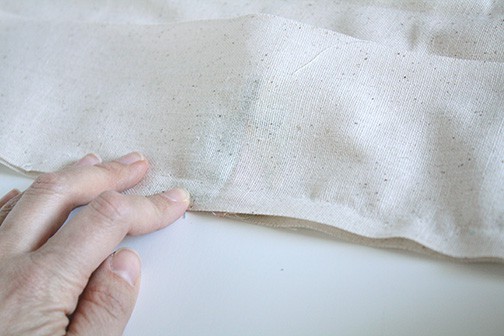
10. Finally, we’ll make the drawstring casing.
Take the inner top pieces and fold them down inside the bag and press like this:
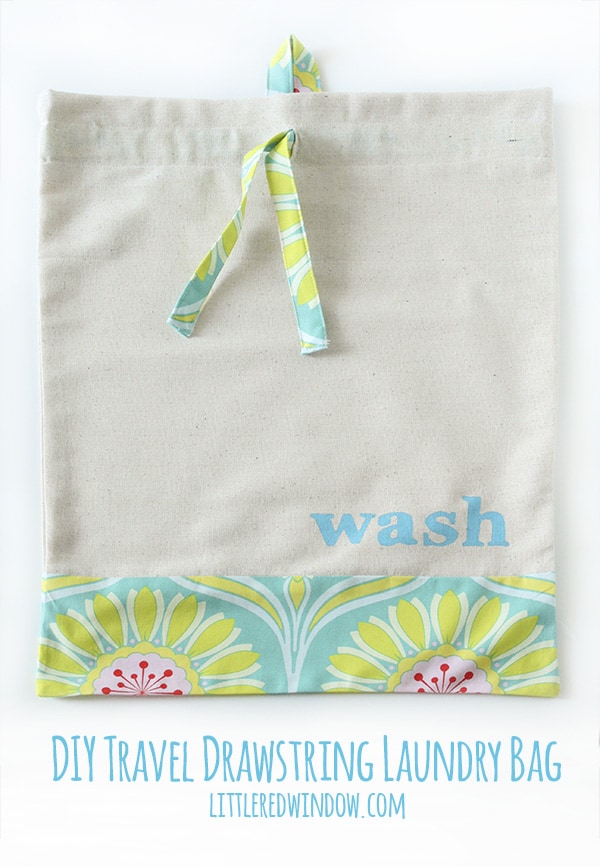
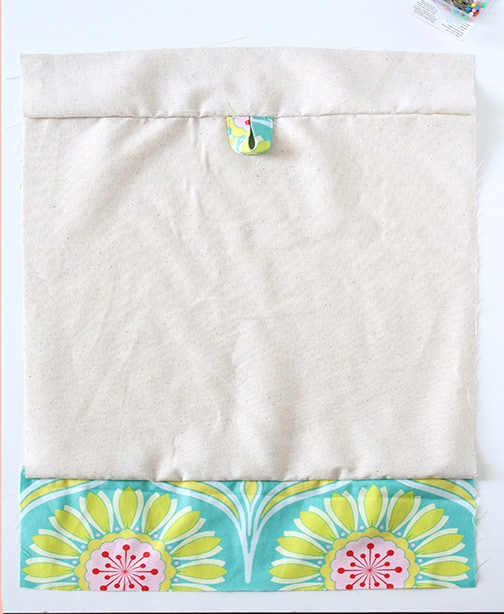
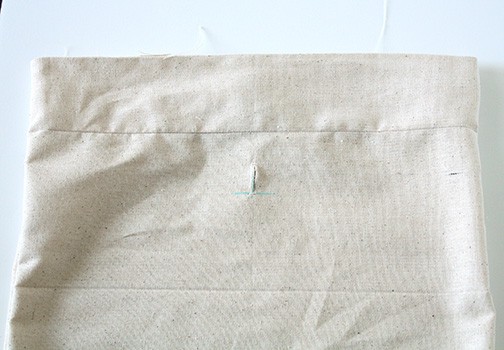
When you’re done your bag will look like this!
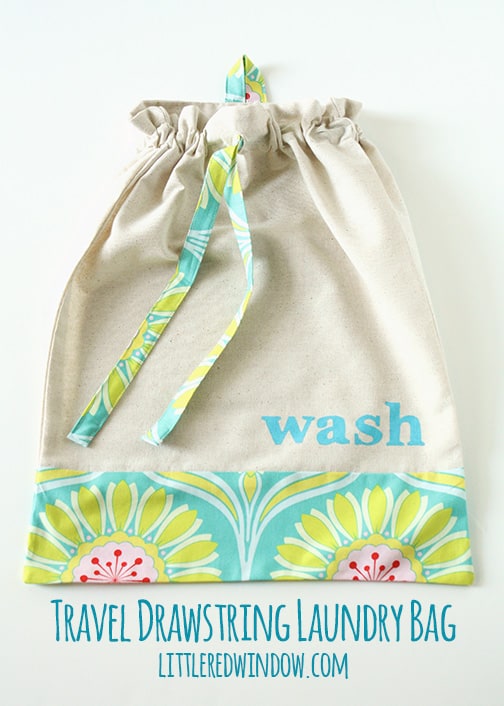
Happy traveling friends!
If you liked this, you may also like some of my other posts…


- Crayon Scarf Knitting Pattern - July 21, 2026
- Pencil Scarf Knitting Pattern - July 7, 2026
- Tri-Color Linen Stitch Hat Knitting Pattern - June 22, 2026
Samantha says
Love this DIY Drawstring Travel Laundry Bag, something useful, thanks for sharing with us.
Barbra says
Can someone please tell me the finished size of the laundry bag, thanks.
Cassie May says
It’s approximately 15″ x 28″ but really you can make it any size you want!
Hoteluri says
Hola! I’ve been reading your website for a while now and finally got the courage to go ahead and give you
a shout out from Kingwood Texas! Just wanted to say keep up the
fantastic work!
Cassie May says
Aww, thanks! Nice to meet you!
zee says
thank you for this lovely easy tutorial… i made one to send it for my dad with my bro who traveled to India last night. instead of the ” wash ” logo i just did a hand embroidery ” dad “..:) … thanks dear ..
Cassie May says
What a great idea! So glad you liked it 🙂
Jacqui says
Thank you for this fabulous (and adorable) tutorial! I bought a sewing machine with my birthday money, and this is the first thing I’ve sewn in 17 years. I’m super pleased with how well it turned out, and I attribute it entirely to your awesome instructions – this finishing level is much better than anything I ever accomplished in Junior High Home Ec. 😉 Thanks!!
(My finished bag: http://tinypic.com/r/2h846x3/8)
Cassie May says
oh my gosh, yours is ADORABLE! I’m so glad you liked the tutorial and found it easy to follow! Thanks for stopping by!
Staci says
So cute! Thank you for sharing the instructions; I can’t wait to make one 😀
Cassandra May says
Thanks Staci! I’d love to see it!!
Deborah says
Such a cute laundry bag and a great tutorial! Thank you for sharing at What We Accomplished Wednesdays. Have a lovely week! ~Deborah
Lea says
This is so cute. Thank you for a great tutorial.
Mel (@MamaBuzz) says
This is such a great idea! I think I may just make this before our vacation this summer. Those little hotel plastic bags always rip too, because they’re never big enough. This is perfect. Thank you for sharing on Inspire Me Wednesday. Featuring you in next week’s issue.
Elina P says
Love this Mini Laundry Bag you created!! Stopping by from the Craft Frenzy Friday Party to say HI!! 🙂
Rachelle P. Smith says
I love this! Very nice tutorial on the drawstrings! Thanks for sharing!
Kathleen @ Fearlessly Creative Mammas says
This is the cutest laundry bag I have ever seen! I lived in China and Korea for awhile and they have fabric laundry bags in the hotels. They aren’t as wonderful as this at all! Thanks for linking up to Tips and Tricks.
Pamela says
Oh, this is just too awesome! I wish I was skilled at sewing and/or owned a sewing machine! I’m determined to learn. I would love to be able to create something like this!Your tutorials are absolutely amazing and clear, I will have to try learning through your blog! ;D
Melissa @ My Recent Favorite Books says
This is so cute!! Thanks for the notes on how to make it!
Im a new follower from “Thursday Favorite Things”!
Hannah says
Adorable!!! And an excellent tutorial too! I love freezer paper stenciling! 🙂 Thanks for joining us at the Mom-Lovin hop today!
Gentle Joy says
Pretty………..and functional. 🙂 Thank you for sharing this. Gentle Joy
Julie says
This is so lovely, and so worth that extra effort you have put in. Your step by step is brilliant, (I especially love the fact your hands look normal – like mine – so many people have such perfect manicures I was starting to worry my regular nails were not up to scratch. I mean this as a compliment, reading it back I’m not sure it sounds as complimentary as I am intending!)
Cassandra May says
Haha, Julie, I knew what you meant! And really, when you’re a regular crafter what’s the point of getting a manicure? It just gets ruined in two seconds!
Jennifer | The Deliberate Mom says
Oh my goodness! This is simply the cutest! I want to make one for my daughter for when she goes on sleepovers. Fabulous tutorial… thanks so much for sharing.
xoxo
Cassandra May says
That is a great idea Jennifer! I don’t know why I didn’t think of that, I’ve got to make one for my little one for when he goes to Grandma & Grandpa’s!
Alisha @ Crafty Brooklyn Army Wife says
I love this!! I pinned it to my wall http://pinterest/ali0423
Stopping by from Rae Gun Ramblings Block Party. Here is what I shared this week: http://craftybrooklynarmywife.blogspot.com/2014/01/embroidery-designs.html
Emily says
Beautiful! I love to travel too, I’m a backpacker traveler. A wash bag would be great since I’m always hand washing stuff along my travels.
Adelemamabrown says
That is so creative and cute! I have been wanting to make some drawstring bags out of burlap and then just stuff them and make them into pillows!
Cassandra May says
Thanks Adelemamabrown! That’s a great idea! Check out my 3 seam drawstring bag tutorial if you want it to go super fast!