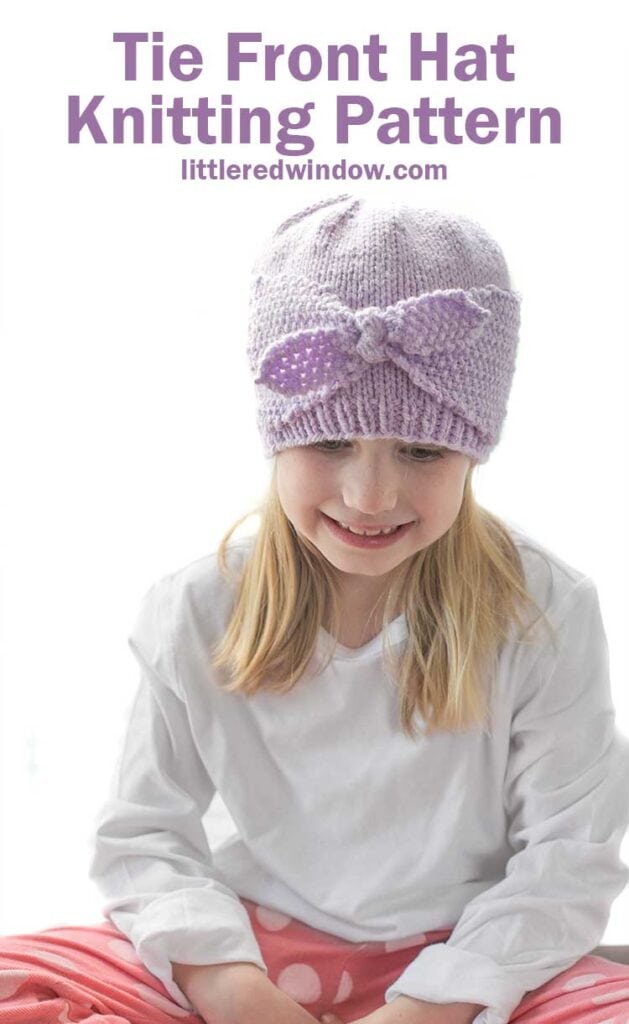
The tie front hat knitting pattern has a cute seed stitch tied bow in the front center, it’s an adorable knit for your little one!
So, the other day, I saw a very cute headband that tied in front and I though to myself, “a hat like that would so cute!” So I figured out how to knit one and I have to say, it turned out really adorable, if I do say so myself.
If you’ve been here a while, you may also know, I don’t really like seaming things very much. This hat is knit in the round and then you will pick up stitches along the sides of the hat to knit the ties. I think it’s easy and then you know the ties are very secure. The seed stitch adds a fun texture and makes sure that the ties lay flat and don’t curl up along the edges. Let me know how that works for you all!
Another thing I love about this cute baby hat knitting pattern is that the ties are a little bit adjustable. If your hat is a little big, you could tie the tie tighter (try saying that five times fast).
Are you ready to knit a tie front hat with me? Let’s do it!
Tie Front Hat Knitting Pattern
(includes Sizes 0-3 months, 6 months, 12 months, 2T+)
Gauge: 20 stitches = 4 inches
- Worsted weight yarn
- US 7 (4.5 mm) 16″ circular knitting needles
- US 7 (4.5 mm) double pointed needles
- Yarn needle
(If you need help, my favorite knitting reference book for everyone from beginners to advanced knitters is THIS ONE!)
Looking for the pattern? Here’s how it works: This pattern is available for FREE in one size right here on my site (keep scrolling down). Or for just a few dollars, you can choose to purchase an upgraded PDF pattern that is nicely formatted and easy to print. Besides being easy to print, the PDF pattern also contains MORE SIZES with instructions for additional sizing including 0-3 months, 6 months, 12 months and 2T+! Thank you for supporting Little Red Window!
Tie Front Hat Knitting Pattern Instructions (size 12 months)
Using long-tail cast on, cast on 72) stitches onto your circular needles. Join to knit in the round and knit 1 stitch, purl 1 stitch in a rib stitch for 4 rounds. Then knit all rounds until the hat is about 5 inches long.
Decrease (divide your stitches between 3 double pointed needles or use magic loop):
Round 1: (k6, k2tog) repeat to the end of the round
Round 2: knit all stitches
Round 3: (k5, k2tog) repeat to the end of the round
Round 4: knit all stitches
Round 5: (k4, k2tog) repeat to the end of the round
Round 6: knit all stitches
Round 7: (k3, k2tog) repeat to the end of the round
Round 8: knit all stitches
Round 9: (k2, k2tog) repeat to the end of the round
Round 10: knit all stitches
Round 11: (k1, k2tog) repeat to the end of the round
Round 12: k2tog and repeat to the end of the round
Cut yarn, thread through loops and pull to close. Weave in ends.
To add the ties:
Find the halfway point on opposite sides of the hat and mark with a stitch marker. Then using your double pointed needles as straight needles, pick up 20 stitches in a vertical column, starting just above the ribbed brim.
Row 1: (k1, p1) repeat to the end of the row
Row 2: (p1, k1) repeat to the end of the row
Rows 3-4: repeat rows 1-2
Row 5: p2tog (k1, p1) repeat to the end of the row. (19 stitches)
Rows 6-8: (p1,k1) repeat to the last stitch, p1
Row 9: k2tog (p1, k1) repeat to the last stitch, p1 (18 stitches)
Row 10: (p1, k1) repeat to the end of the row.
Row 11: (k1, p1) repeat to the end of the row.
Row 12: k2tog (p1, k1) repeat to the end of the row (17 stitches)
Rows 13-15: (k1, p1) repeat to the last stitch, k1
Row 16: p2tog (k1, p1) repeat to the last stitch, k1 (16 stitches)
Row 17: (k1, p1) repeat to the end of the row.
Row 18: (p1, k1) repeat to the end of the row.
Row 19: p2tog (k1,p1) repeat to the end of the row (15 stitches)
Rows 20-21: (p1,k1) repeat to the last stitch, p1
Row 22: k2tog (p1, k1) repeat to the last stitch, p1 (14 stitches)
Row 23: (p1, k1) repeat to the end of the row.
Row 24: (k1, p1) repeat to the end of the row.
Row 25: k2tog (p1, k1) repeat to the end of the row. (13 stitches)
Rows 26-27: (k1, p1) repeat to the last stitch, k1
Row 28: p2tog (k1, p1) repeat to the last stitch, k1 (12 stitches)
Row 29: (k1, p1) repeat to the end of the row.
Row 30: k2tog (p1, k1) repeat to the last 2 stitches, p2tog (10 stitches)
Row 31: (p1, k1) repeat to the end of the row.
Row 32: (k1, p1) repeat to the end of the row.
Row 33: k2tog( p1, k1) repeat to the last 2 stitches, p2tog (8 stitches)
Row 34: (p1, k1) repeat to the end of the row.
Row 35: (k1, p1) repeat to the end of the row.
Row 36: k2tog (p1,k1) repeat to the last 2 stitches, p2tog ( 6 stitches)
Rows 37-55 ODD rows: (p1, k1) repeat to the end of the row.
Rows 38-56 EVEN rows: (k1, p1) repeat to the end of the row.
Row 57: k2tog, p1, k1, p2tog (4 stitches)
Row 58: k2tog, p2tog (2 stitches)
Row 59: k2tog
Cut yarn and pull through remaining stitch. weave in ends.
Pick up 20 more stitches on the opposite side of the hat and knit another tie. Then, when you are finished, bring both ties to the front and tie them in a double knot to make the bow. You may want to add a couple of stitches to secure the knot if your little one likes to pull on their hats!
Happy Knitting!
If you liked this, you may also like some of my other posts…


- 10 Tips for Organizing Your Craft Supplies On a Budget - April 25, 2024
- Rib Zag Hat Knitting Pattern - April 23, 2024
- Double Stockinette Stitch Knitting Pattern: Easy How To for Beginners - April 18, 2024


Leave a Reply