Why am I making a DIY Simple Zipper Pencil Case? So, if you’re new here, you may or may not know that I used to be an architect and spend quite a bit of time drawing and I am particular about my pencils. But actually that’s a habit acquired in architecture school where you quickly learn NOT to use someone else’s pens or pencils without asking. People are very picky about that. Anyway, for someone who is picky about drawing tools and spends a lot of time drawing, I was using a crappy pencil case. It was tiny and didn’t fit things like my compass or the little drawing triangle I like to have with me.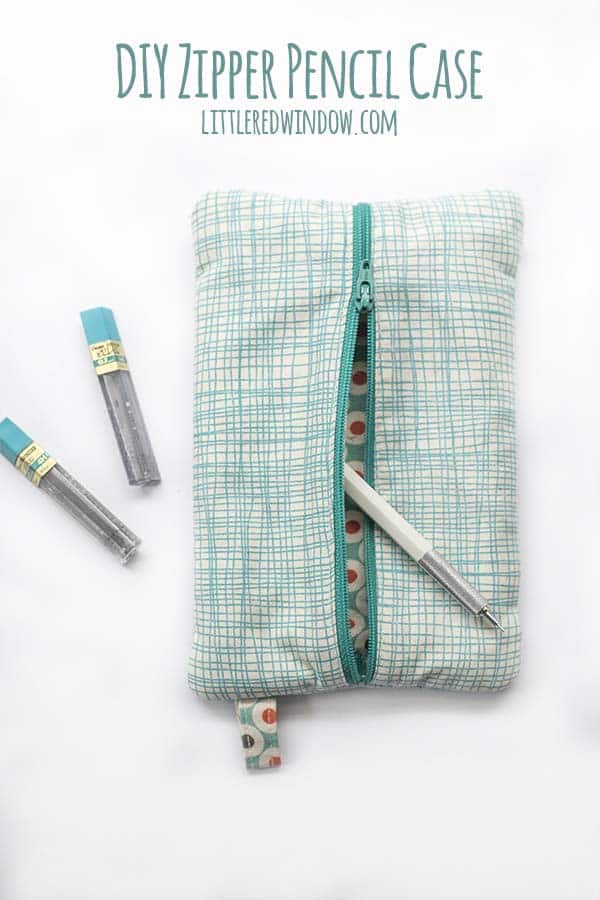
So a new pencil case was in order and a couple weekends ago, I whipped one up. I know there are a million and one zipper pouch tutorials out there on the web but as always, my aim is to give you one that simplifies the process as much as possible. I’m all about efficiency which I hope is helpful!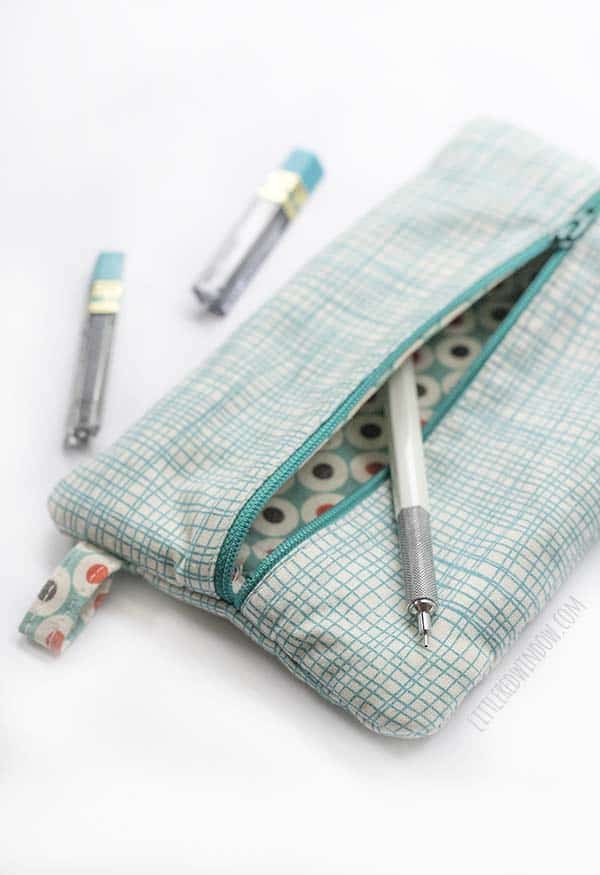
DIY Simple Zipper Pencil Case Supply List
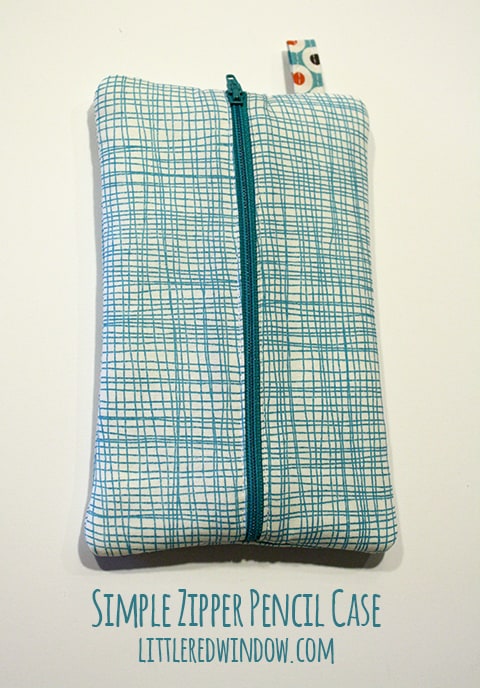
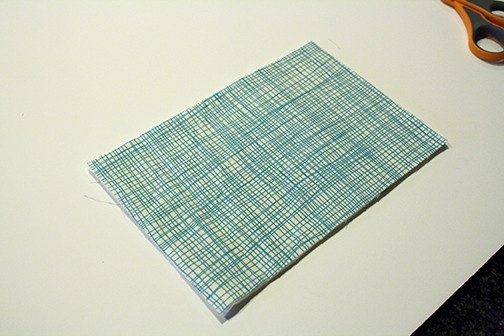
finished size: 5″ x 8″
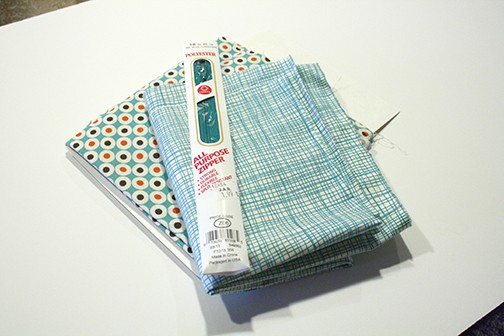
Cut List:
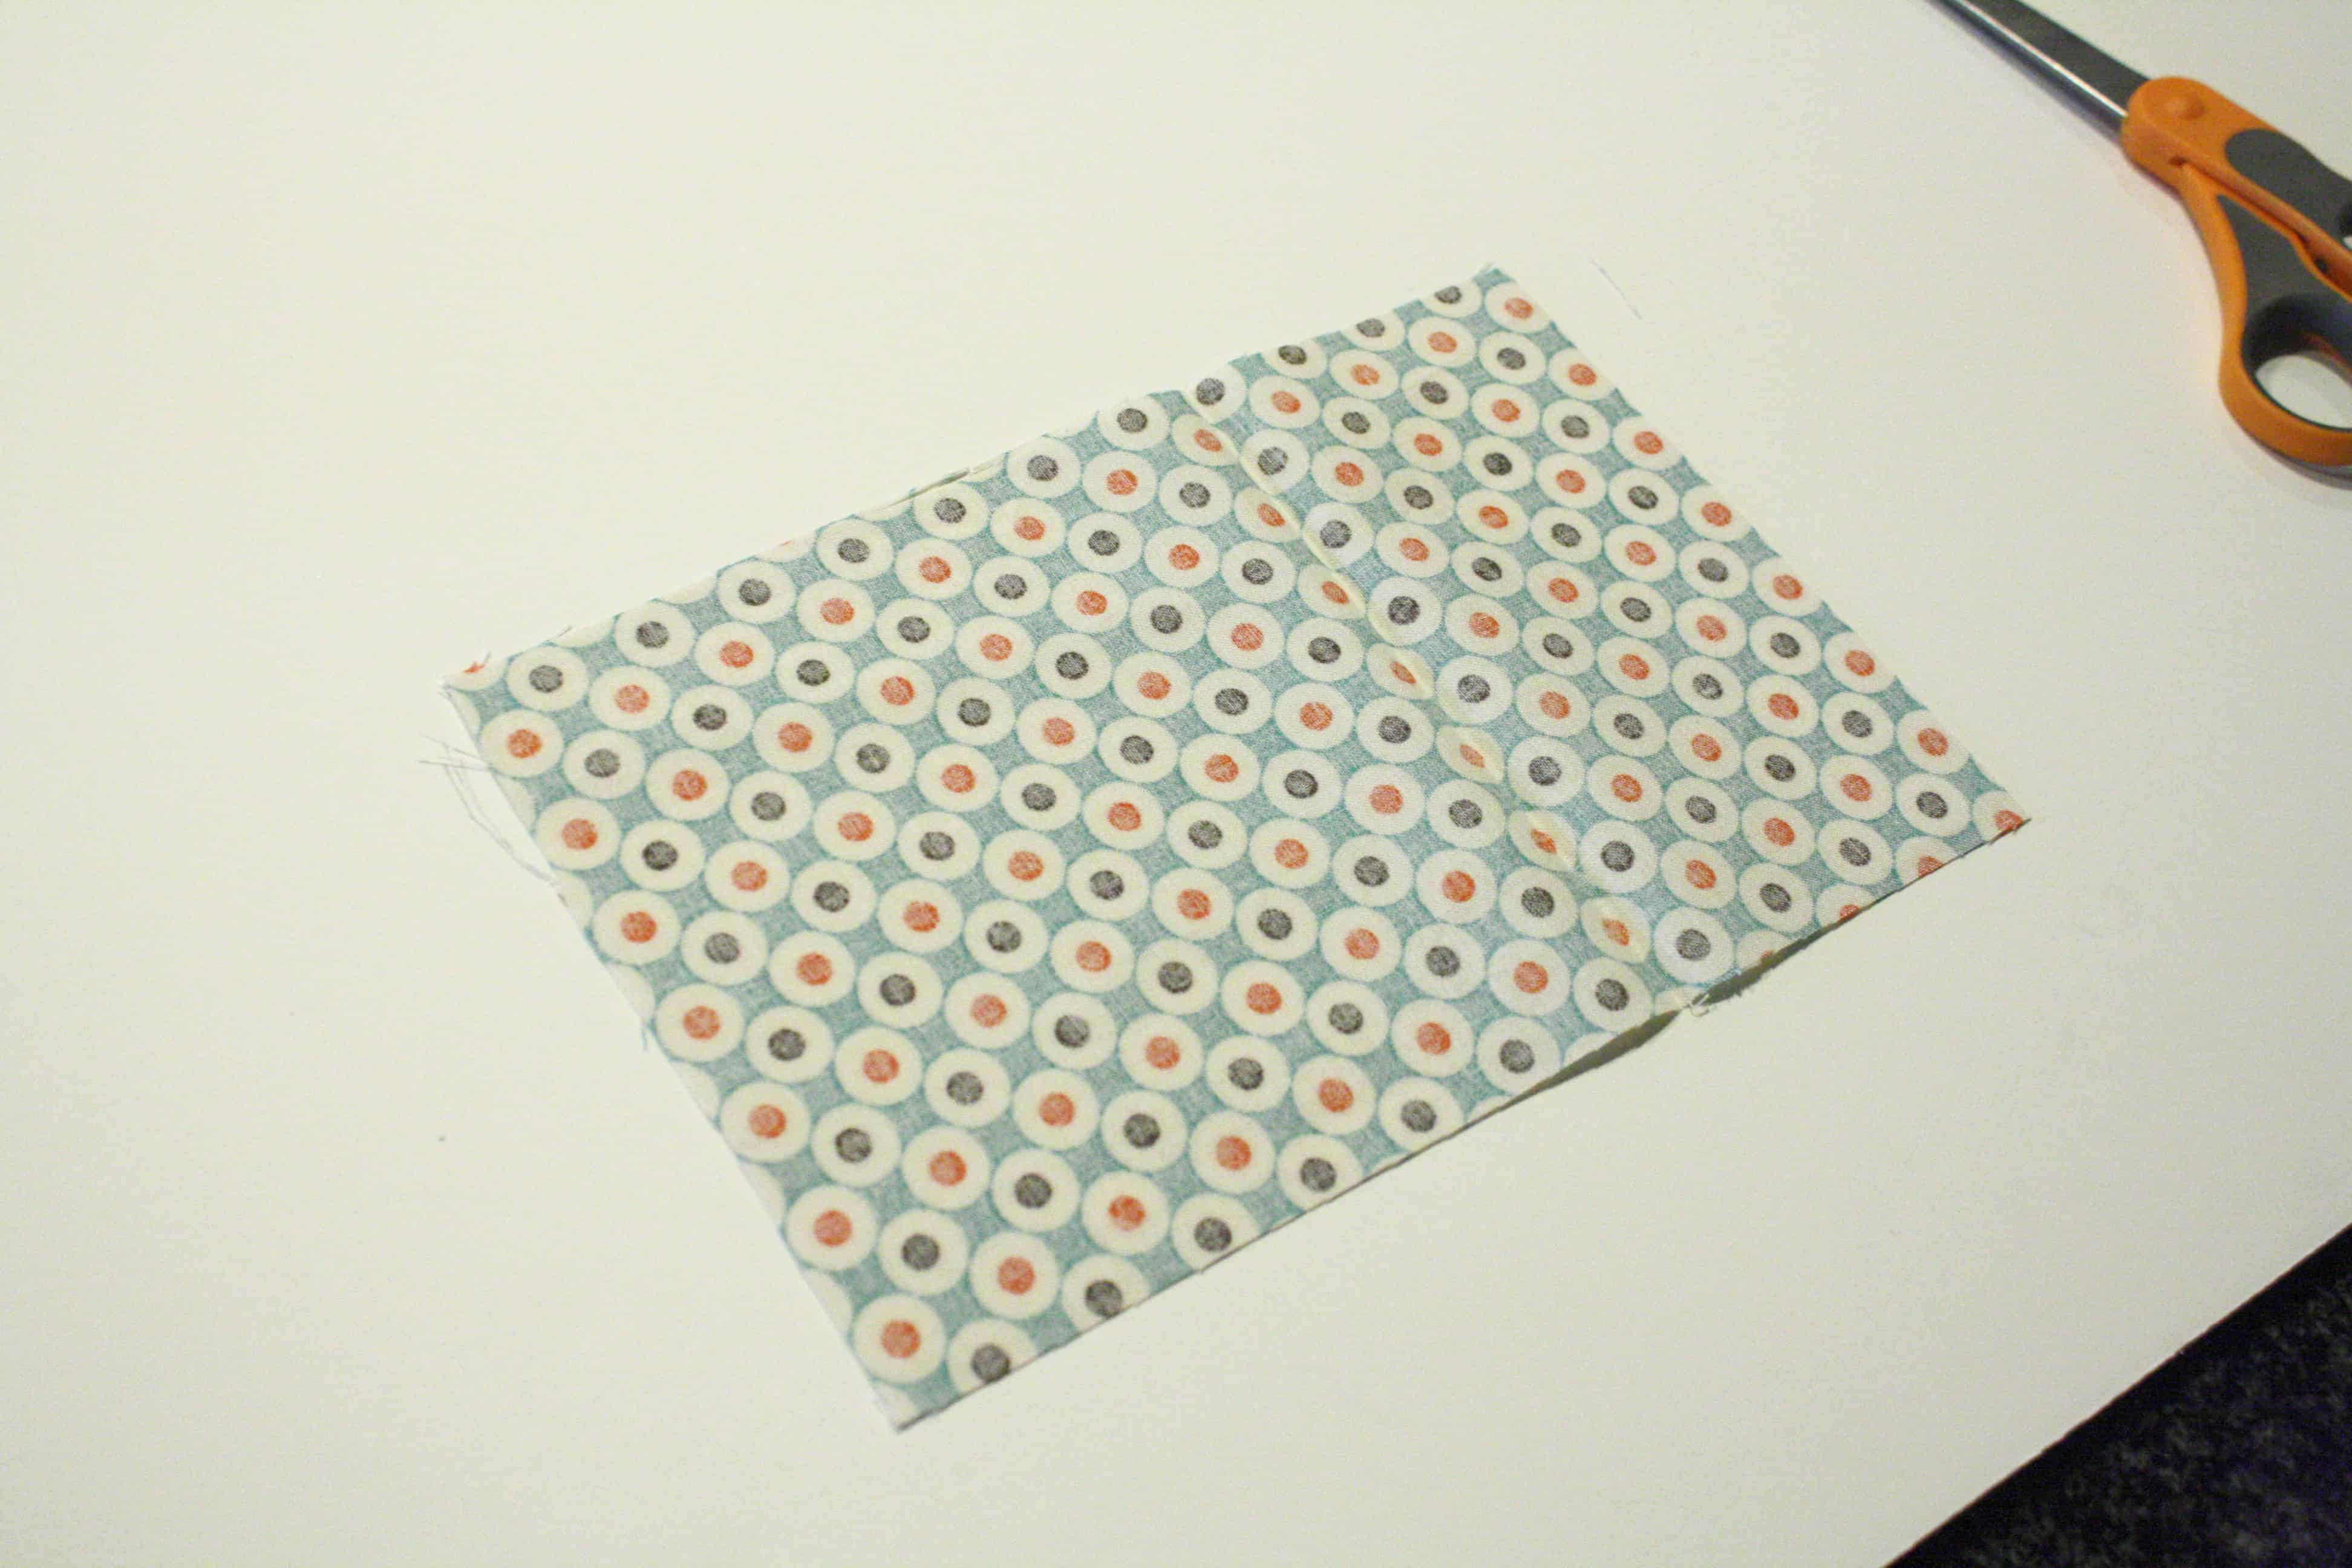
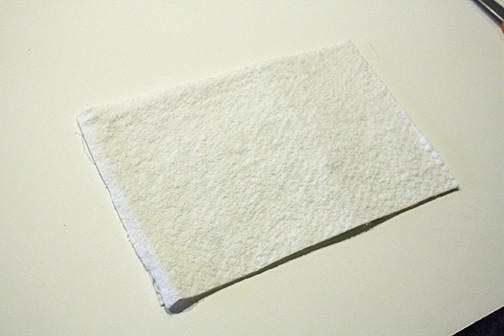
- 1 each from outer fabric, lining fabric and batting : 6″ x 9″ rectangle – this is the back of the pouch
- 2 each from outer fabric, lining fabric and batting: 3.5″ x 9″ – these will be the top of the pouch.
- 1 rectangle from lining fabric for loop tag: 2″ x 4″

DIY Simple Zipper Pencil Case Instructions
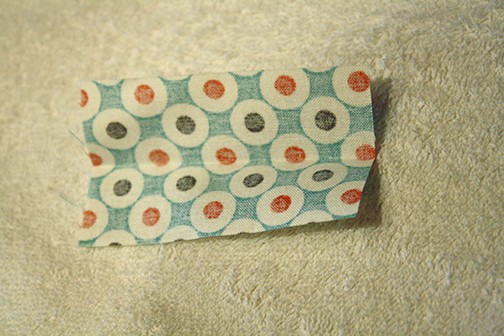
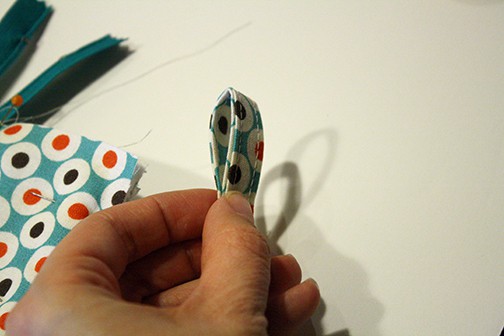
1. First we’ll make the loop tag. Take your 2″ x 4″ rectangle and iron it in half the long way.
Then fold each long edge in to the middle and press again.
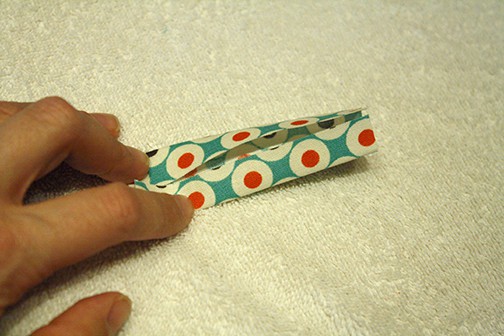
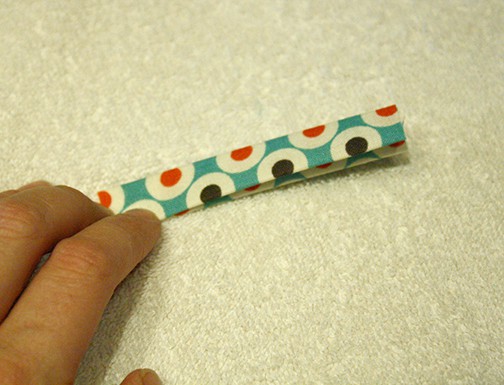
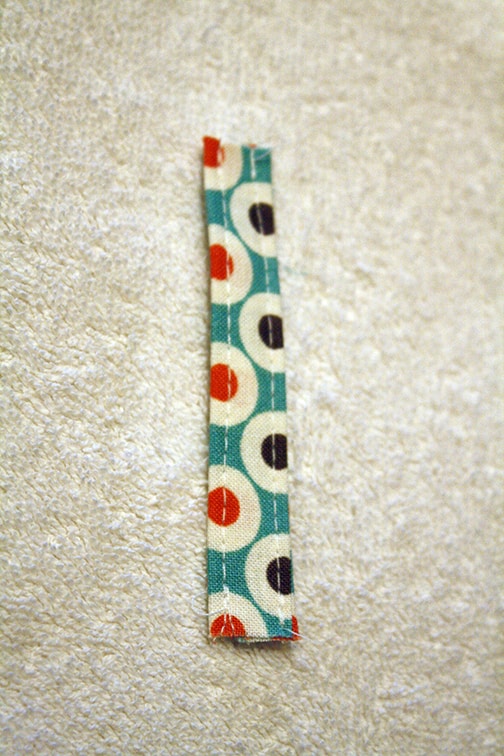
Now fold in half, one more time and pin.
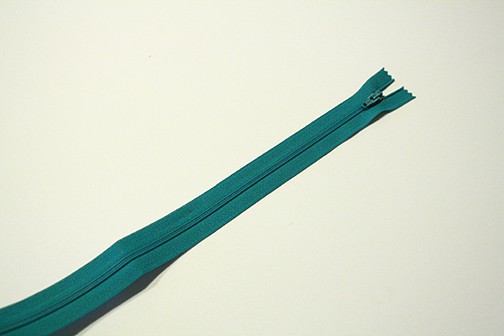
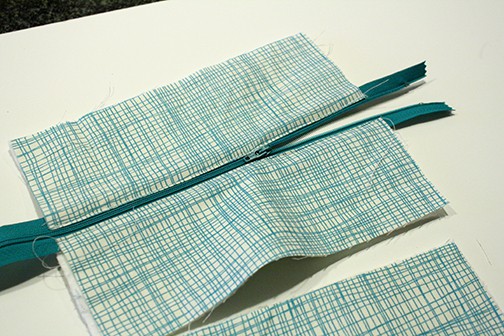
2. Next, lay out your zipper face up.
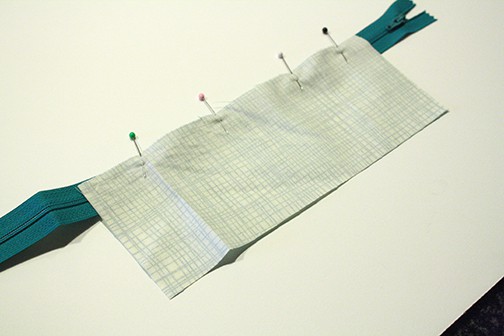
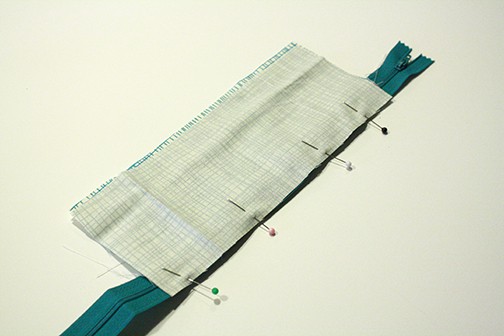
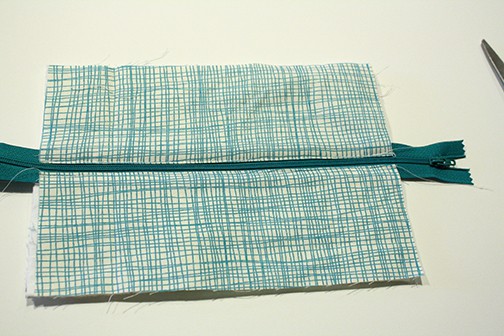
Take one piece of the top outer fabric (one 3.5″ x 9″ rectangle) and lay it face down on top of the zipper as shown in the photo. Pin, and then, using a zipper foot, carefully sew alongside the zipper.
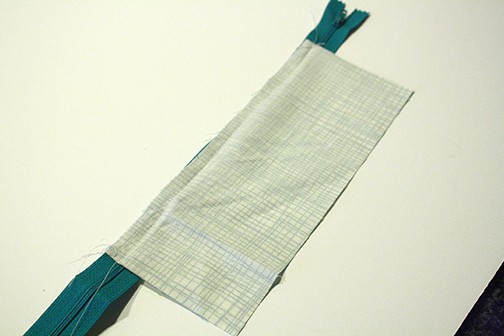
Fold back the top fabric and it should look like this:
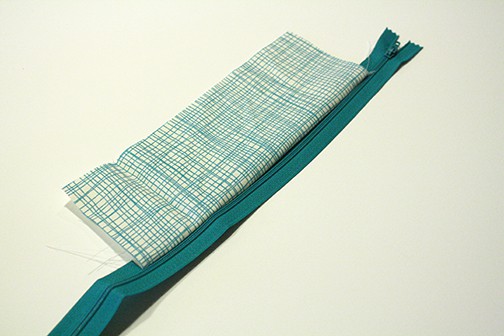
Now repeat with the other 3.5″ x 9″ outer fabric rectangle on the opposite half of the zipper.
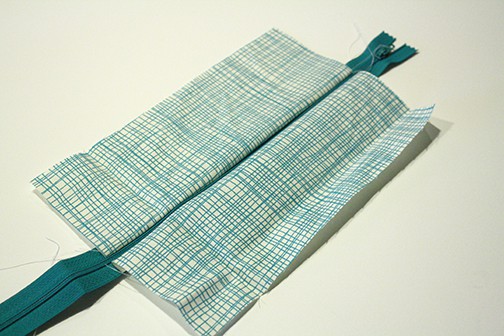
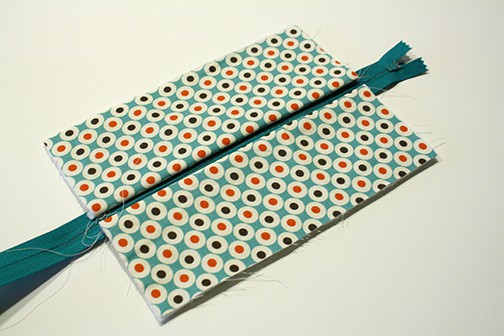
Now the top part of the pouch is done, set it aside for a minute.
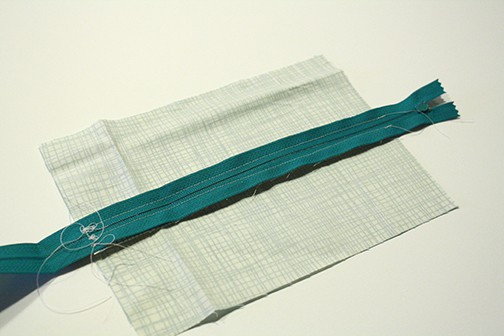
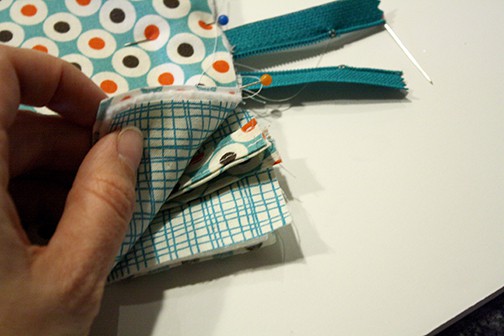
3. Now to construct the pouch! First lay the 6″ x 9″ bottom lining piece down face down. Layer one layer of batting and then the 6″ x 9″ outer piece face UP so you have a three layer sandwich.

Next lay the zipper pouch top down with the outer fabric face up and open the zipper half way. This is VERY important, if you forget, you won’t be able to turn your bag right side out. (Although, trust me, I know from experience, that is a mistake you only ever make once!)
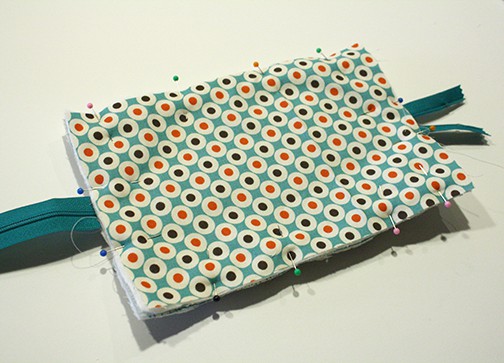
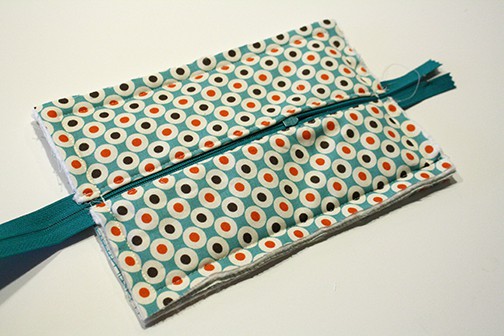

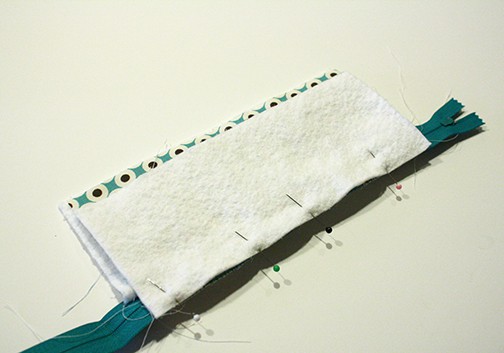
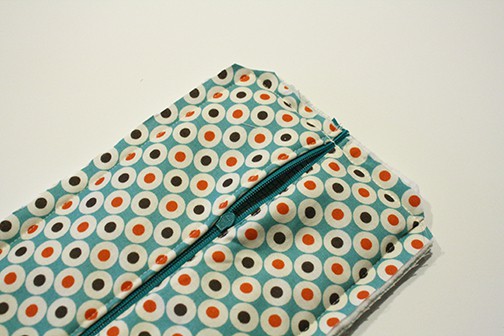
Now clip the corners on the diagonal being careful not to cut your stitching.
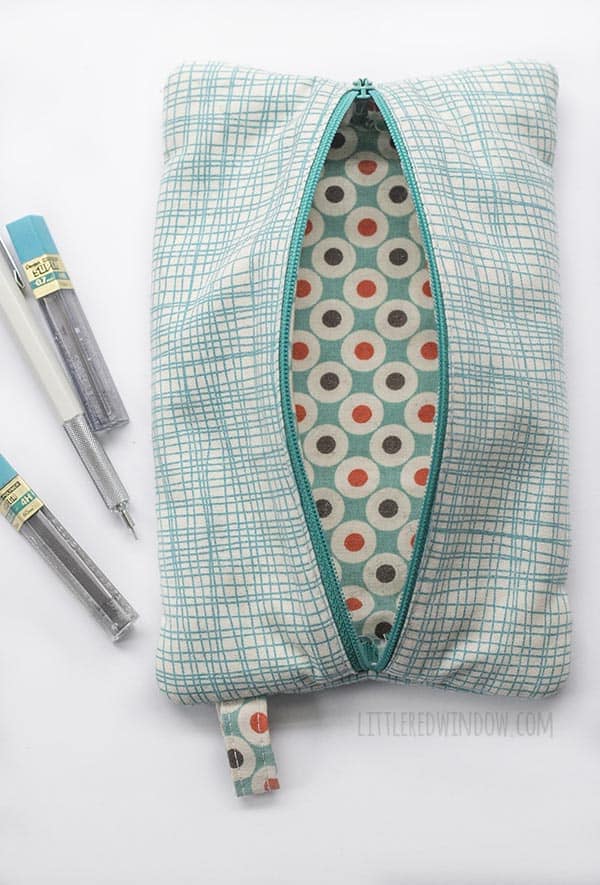

This little pouch is the perfect size for me to carry three mechanical pencils, several kinds of erasers, a 6 inch ruler, a 6 inch drawing triangle AND a little compass. Please let me know if you make one, I’d love to see it!
If you liked this, you may also like some of my other posts…


- Crayon Scarf Knitting Pattern - July 21, 2026
- Pencil Scarf Knitting Pattern - July 7, 2026
- Tri-Color Linen Stitch Hat Knitting Pattern - June 22, 2026
Michelle says
i procrastinated for a week and finally made one!!! it came out perfect! thank you!
Cassie May says
awesome, I’m so glad to hear that!!
michelle hamilton says
I really like your pencil pouch pattern! I really want to make one but was wondering if there is any way to make this with hidden seams?
Isabella M. says
HI there Cassie!
This is a great idea for my grandmother for Christmas, and for me for school! So cute! Happy holidays!
Isabella M. says
SO CUTE! Great gift idea for my grandmother, who can put her sewing things in it, and she’ll love the handmade gift! It would also work great for me in school! Thanks so much! Happy holidays!
Cassie May says
oh great! Have fun sewing!
https://tvtap.win says
When someone writes an piece of writing he/she keeps the plan of a user in his/her mind that
how a user can understand it. Thus that’s why this post is amazing.
Thanks!
Jodie says
Hi there Cassie. Love that you have simplified a zipper pouch. Perfect for back to school. I’ve shared your tutorial in our latest back to school crafts inspiration roundup. Our readers will enjoy it. https://craftylikegranny.com/back-to-school-crafts/ Cheers Jodie 🙂
Patty says
Just completed one. Thanks so much for the tutorial. I will let you know when I post it on my blog!
Cassie May says
Great! So glad you like it!
Claire Potts says
Hi. Great tutorial and lovely blog! I’ve added a link to this one in my latest blog post at http://www.mymondaymakes.co.uk.
axelle says
Thanks a lot for your very easy and clear tutorial. Here is my version http://www.pinterest.com/pin/69594756717453872/
Cassie May says
lovely! thanks for sharing!
Sara Brennan says
Made my first one of these a couple of weeks ago, and made four more this weekend. Thanks for getting my sewing mojo going, Cassie! Fun pattern, excellent tutorial!
Cassie May says
Oh great! So glad to hear that!
Nicole says
Made this pencil case for a friend today. Really easy to follow directions
Cassie May says
oh great! I’m so glad you liked it! thanks for stopping by!!
Eileen says
Great tutorial very clear instructions and pictures.
Cassandra May says
thanks Eileen!
Melissa says
Hello. Thank you for this tutorial! It was super easy. I goofed up a bit and didn’t stay close to the zipper edge so I had to cut probably a half inch from each side of the 2 non zipper pieces but it still turned out super cute!
Cassandra May says
oh good! So glad you liked it!
An D says
Thanks for the tutorial! I used it to make small presents for my daughters teachers. School year will end next Friday and they will be pleased with these lovely pencil cases! Your tutorial made it easy for my daughter to help: she did the preparations (draw and cut the pieces), I sewed the zipper parts, and my daugther sewed the finishing rectangle all around. She also did a zigzag stitch on the raw edges – after cutting it with pinking shears. It took a bit more time, but the inside looks great now too! Pictures are here: http://www.onderdeblauwemaan.be/wp_odbm/2014/06/juffencadeautjes/
Thanks again!
Cassandra May says
oh my gosh, they turned out so cute! So glad your daughter was able to help and that the tutorial was helpful! That makes me so happy! If I was giving them as gifts, I would definitely finish the inside edges too, mine was just for me so I skipped that part 😉 Thank you so much for stopping by to share!
Jennifer Dawn says
LOVE IT! This is such a cute sewing project, and that fabric is amazing!
Deborah Smith says
What a great tutorial! I sew, and the thought of zippers intimidates me! This is such an easy way to do it. Thank you for sharing at What We Accomplished Wednesdays. Have a great week! ~Deborah
Cassandra May says
I used to be scared of them too. And buttonholes. Oddly I tackled zippers first but it turns out buttonholes are totally easier! Hope you give it a try!
Emily Thompson says
super cute!! I love the fabric! Thanks for linking up to Create Link Inspire, you are featured this weekend! I’ve shared it all around and would love for to as well if you get a chance ;o) Emily@Nap-Time Creations
Janice Tonnessen (Nearly Handmade) says
Fanciest Pencil Case… Ever! You may have given me the courage to tackle a zipper project. Nice tutorial. Thank you!
CJ Huang says
I’m liking your blue outer fabric! Great, simple tutorial for making a pencil case or small zippered bag. 🙂
Cassandra May says
Isn’t it great? I have it in black too, I’m so wishing I had bought more of it!!!
D@TheShadyPorch says
Nice tutorial…I like lots of pictures! I pinned it to my Crafts:Sew-No Sew board. Thanks for sharing at the #partyontheporch. Blessings, D@TheShadyPorch
Ren says
Great tutorial! I’d love to see you join us at the Inspire Us Thursdays! link party at http://www.theinspiredwren.com.
Cassandra May says
done! Thanks Ren!
Sarah @ Quilt Candy says
Oh wow what a simple but gorgeous pencil case and thanks so much for the tutorial! I’d love to give it a try and I’ll be sure to let you know when I do!
Cassandra May says
Thanks Sarah! I’d love to see a pic!
Jenna (@aSavoryFeast) says
I am brand new to sewing but this looks like a project I could handle! The fabric you used is really cute, too! Thanks for sharing this with Hump Day Happenings.
Corey @ Tinysidekick says
Love this project one because I too am particular about my pencils, and two it is the perfect project to mix and match cute fabrics! Pinning so I can make one for my kid’s stuff for the car! Thanks for sharing at The Makers!
Cassandra May says
I think only people who are particular about writing instruments truly understand other people who are particular about writing instruments, right?! 🙂 Thanks for stopping by!
Trisha D. says
We totally need some zipped cases around our house! You made it look so easy!
I never tried to make a loop tag before and your tutorial really helped clarify that! Also, really digging that teal sketched fabric!!
Found ya from “The Makers” link party!
Much Love,
Trisha D.
Black and White Obsession
Cassandra May says
Thanks Trisha!
Julie says
I’ve made these before, but years ago, but I have to say this is one of the clearest set of instructions I have ever seen. I too have not opened the zip, and made a lovely little tag/loop and forgotten to put that in too – like you say, you only make mistakes like that once! Your fabrics are beautiful too.
Cassandra May says
Ha! Julie, it’s a miracle I remembered to put the tag in this time! I have a terrible memory! 😉
Marni @ Haberdashery Fun says
Cute. Love the fabric you selected!!!!
Cassandra May says
Thanks Marni! I really wish I’d bought three times the amount of that blue lines fabric!
Shanice says
This is soo cute! I would love it if you joined and contribute your awesome posts at my link party at City of Creative Dreams on Fridays 😀 Hope to see you there at City of Creative Dreams Link Party