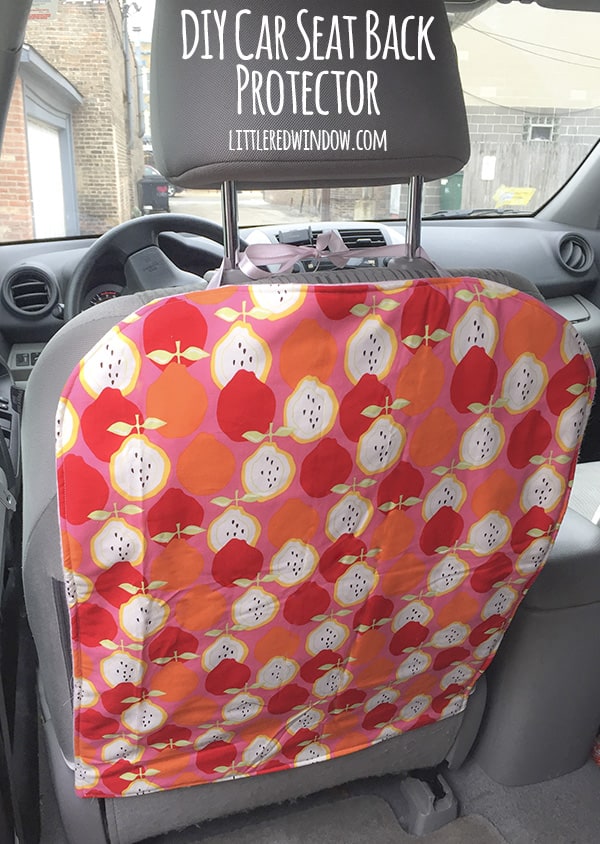
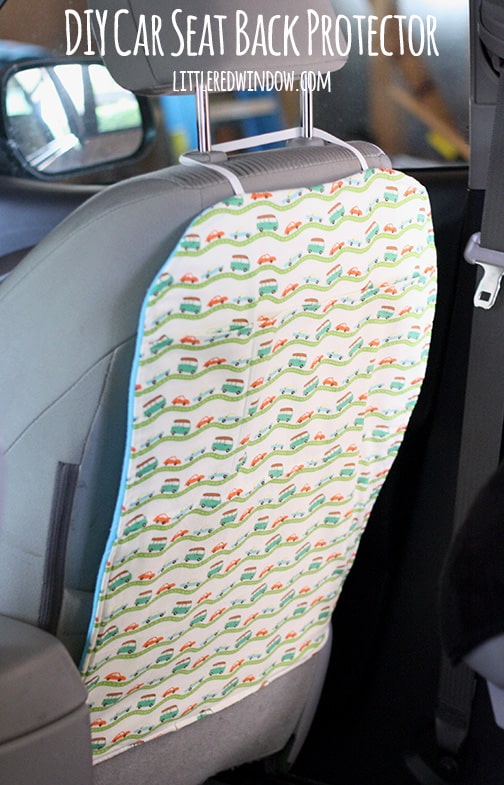
Make your own DIY Car Seat Protector to keep the back of your seats clean and footprint free! Perfect for spring and winter!
Make a quick and easy DIY car seat protector and keep your car seats clean when your kids climb in and out! This post was updated in March, 2018 to add instructions for a new, improved and easier top tie!
[wc_divider style=”dotted” line=”single” margin_top=”” margin_bottom=”” class=””][/wc_divider]
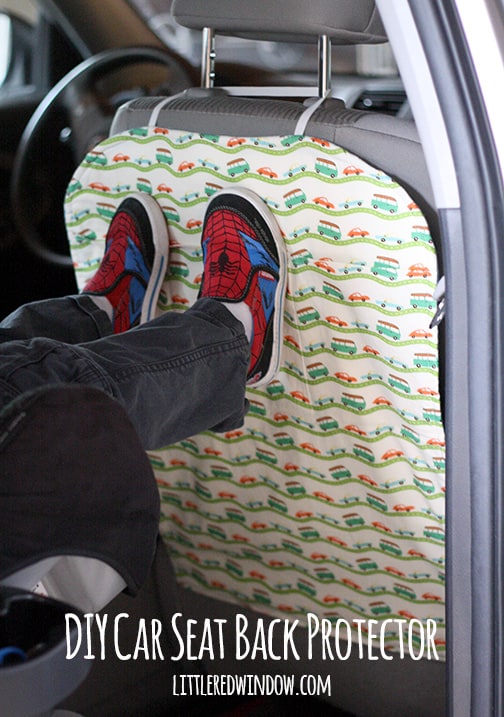
*Edited to Add: my child only put his feet on the seat back for this photo to demonstrate what the DIY car seat protector does. Please be advised, the primary purpose of the DIY car seat back protector project is to protect the car seat back from accidental footprints, dirt, mud and water when your little one is climbing in and out of the car and getting settled. Having your feet propped up during an accident would be dangerous, please do not ride like this. Yes, my son does know how to follow rules and no, he does not ride with his feet propped up like this. No, I do not allow him to kick the seats on purpose because I’m a bad mother (*eyeroll). So if you make your own DIY car seat back protector, please keep that in mind!
[wc_divider style=”dotted” line=”single” margin_top=”” margin_bottom=”” class=””][/wc_divider]
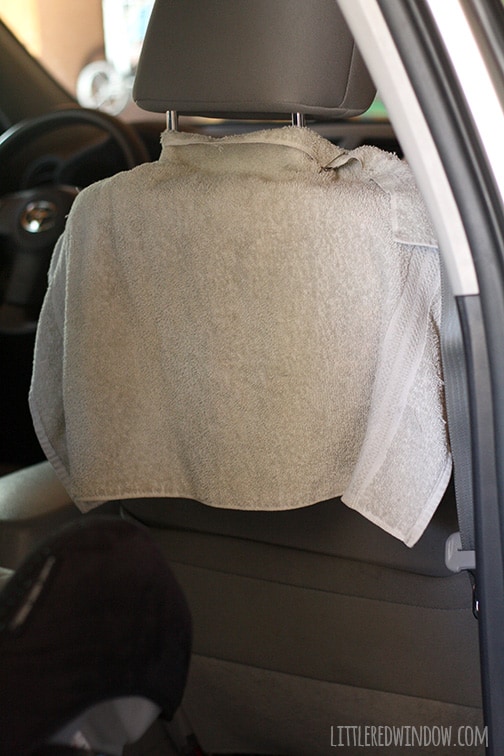
Until you have children, you probably never thought about needing a back car seat protector. I know I didn’t, but a couple of years ago, we bought our first new (to us) car. And you know, if you have small children, that once you switch their car seats to facing forward, they get their little feet all over the back of the front seats when they get in and out of the car. Which is especially bad in the winter with wet slushy boots. Yuck. So for two full years this was our solution:
Ugh. How embarassing! And it didn’t even work that well because O would just accidentally get his feet UNDER the towel and/or it kept falling off. So I quickly sewed my own DIY Car Seat Protector and I couldn’t be happier. It’s completely washable, protects the seat waaaay better than the towel and it even looks cute! I’ll show you how I did it, but keep in mind, seats in different cars will be different sizes and shapes so measure your own car seats before you start!
DIY Car Seat Protector Supply List:
- 1/2 yard of two different fabrics (similar, similar)
- 1 yard cotton batting
- 1/4″ Elastic
- 24″ of half inch grosgrain ribbon
DIY Car Seat Protector Instructions:
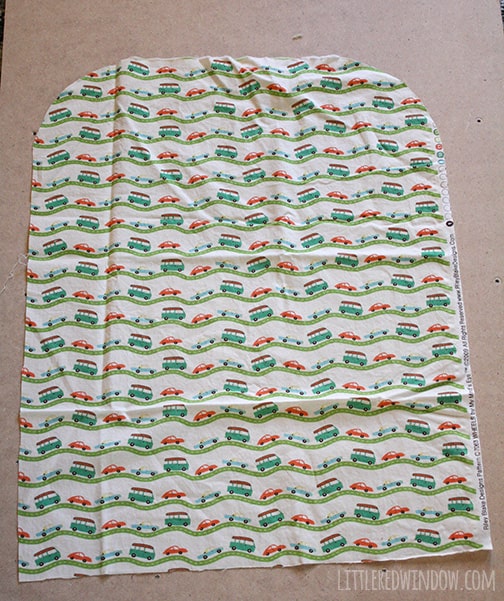
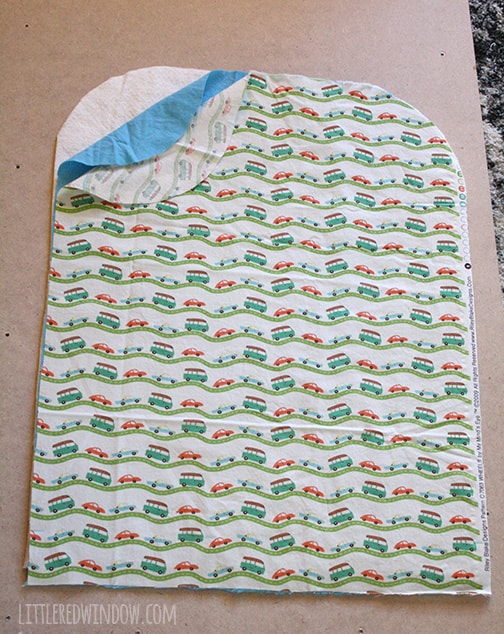
- First measure your car seat back and cut a piece of fabric to fit. Mine was 24″ in height (including seams allowances) and 18″ across at the widest part. To make the curved corners I traced a dinner plate.
- Cut out the same shape from the backing fabric and two layers of cotton batting.
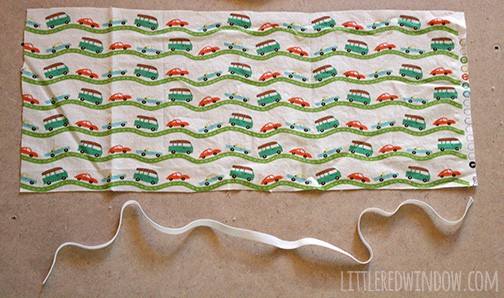
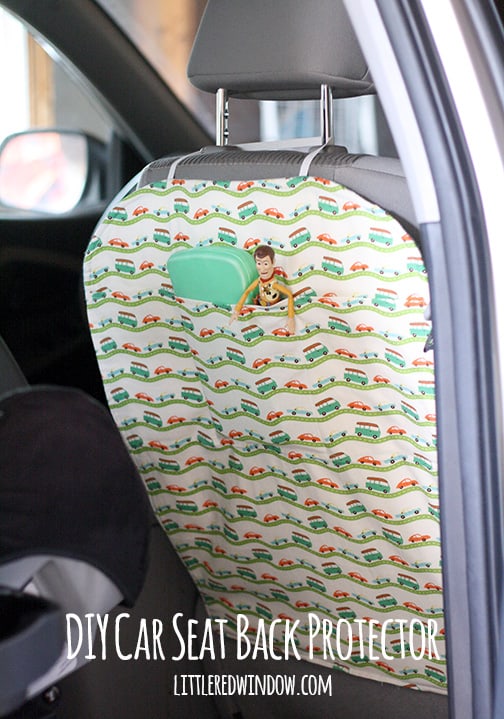
- UPDATED: Thencut one piece of elastic, that goes around the bottom of the car seat, the length of that elastic around the bottom of the seat depend on what kind of car you have so be sure to measure yours! Next, cut two 12″ pieces of ribbon. Make sure to use fray check or a quick stitch on the sewing machine to keep the ends of the ribbon from fraying. Finally, I also cut one pocket. It was one piece of patterned fabric equal to the width of the protector and about 8 inches tall.
- Next fold over the top and bottom of the pocket by 1/2″, pin and hem.
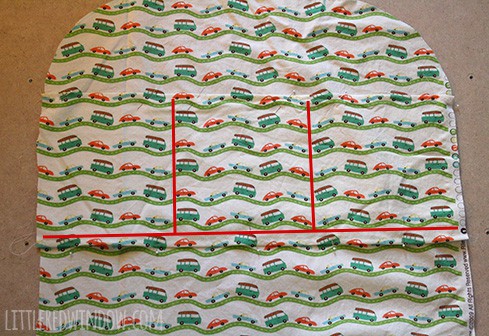
- Place the pocket where you want it on top of the main front fabric piece, pin in place and topstitch across the bottom edge and in two vertical places to divide the pocket. The red lines in the bottom photo show you where to sew. I matched up the pattern between the front of the protector and the pocket, but it’s not necessary. You could use a coordinating fabric for the pocket if you want or even leave it off altogether. (Note, the new pink car seat protector I made has no pocket and it’s just as nice, but it was much faster to make!)
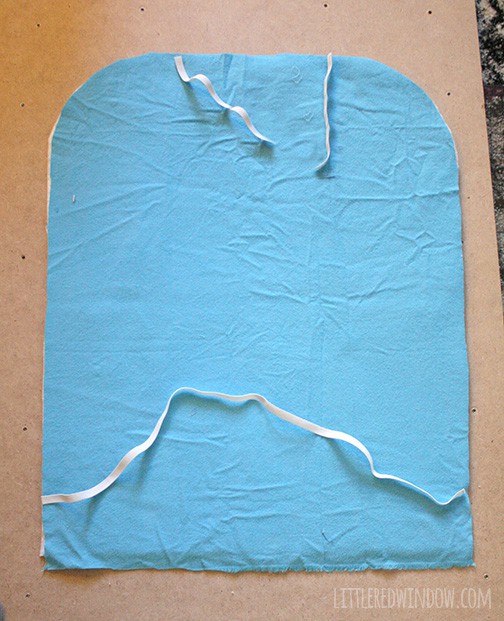
- Then lay all of the pieces down in this order: two layers of batting, backing fabric (right side UP), the elastic and ribbon in place as shown below, and finally the front fabric (right side DOWN).
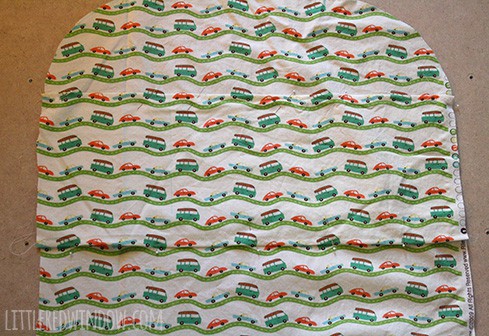
- This picture shows the backing fabric with the elastic and ribbon in place on top. After I took this photo I added the front fabric, right side down, on top and pinned everything together around the edges. Be sure to pin the elastic and ribbon in the right place.
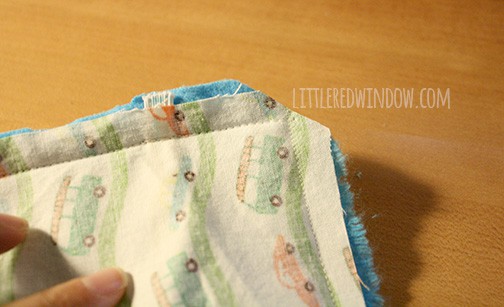
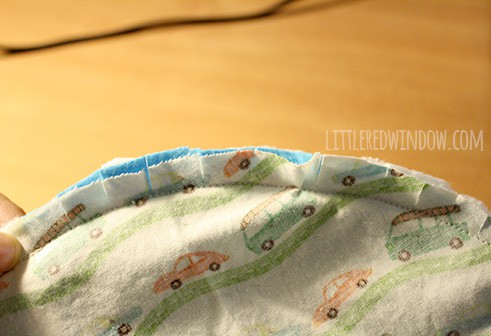
- Sew around the edge of the car seat protector using a 1/2″ seam allowance. Be sure to leave a 6″-8″ opening along the bottom edge for turning it right side out. I usually stitch back and forth a couple times over the ends of the elastic and ribbon to make them extra secure. Before you turn your car seat protector right side out, clip the corners and the curves to reduce bulk in the seams. Be careful not to clip your stitches (ask me how I know!)
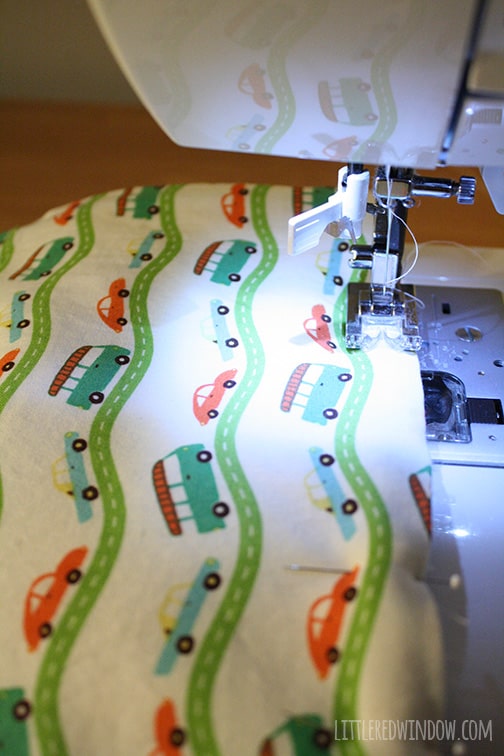
- Turn the car seat protector right side out, press it and then topstitch around the edge of the entire thing making sure to stitch the opening on the bottom edge closed.
- Slide the bottom elastic around the car seat and pull it down until it lays flat against the seat back, then tie the top ribbon ties around the headrest. Wash as necessary!
We are totally loving ours so far. It’s a huge improvement over “the towel”!
If you liked this, you may also like some of my other posts…
- 10 Tips for Organizing Your Craft Supplies On a Budget - April 25, 2024
- Rib Zag Hat Knitting Pattern - April 23, 2024
- Double Stockinette Stitch Knitting Pattern: Easy How To for Beginners - April 18, 2024




BetterFleet says
I don’t understand how this can be confusing or negative. My son has special needs, and one of his favorite things is going for car rides. He gets really excited about the things he sees and likes to move around to get a better look. Sometimes, he puts his feet on the back of the seat to see more clearly. Unfortunately, he accidentally tore the back of the seat off. When I saw your post on Facebook, I thought it was amazing. It’s not about disobedience or bad manners; sometimes, our children are special in their own way, and for that, I’m grateful to you.
Cassie May says
thank you!
SRP Auto says
Awesome content and DIY tips that every car owner car refer and follow through.
Caroline Bradley says
Cassie May,
I was wondering if the car seat protector could be made with ‘oil cloth’. My idea was to attach the elastic and ribbon ties to the backing cloth, which has been hemmed all of the way around, and then just top stitch the front and back together. This method would eliminate the need for the batting and also enable the protector to be wiped clean whilst still in the car. Although I haven’t had a go at this myself I thought I would pass my idea on to you as you are so much better at this sort of thing than I am.
Chrysa H says
I made these for my car. Best thing Ever. I used a sturdy plastic picnic tablecloth so i can wipe mud off. My only complaint is that I didn’t add pockets. Now that my kids are getting bigger, pockets for toys & school stuff is a must. Good thing it’s an easy fix.
Zuzanna says
These work well to slow down muddy dog intent on spreading their ‘joy’ The backseats are covered, but I forgot how mud flies when they shake. Your covers are much prettier than the ones I came up with. We could have used these on the driver’s side with a long legged husband; no matter what, kids are kids and they don’t have to shake to spread mud!
All the best and hope spring comes early for you with lots of flowers.
Karen Guedry says
Can’t wait to make this for my car, have four grandchildren and they all have used the front seat back as their foot rest. Can you do something for the front seat bottom. They now have that seat filthy with spilling cold drinks and such
Akshaya B.K says
I want this kind of a cover may I know if I can get it ready available
Michelle says
I love this! I bought a couple of those ugly black ones off of Amazon, before I knew how to sew, and I really hate them. The “pockets” are all ripped, and the black just does not look nice with my beige interior. I’m definitely making these to protect my seats from my boys! P.S. I didn’t get the opportunity to see any of the negative comments, but people are jackasses. You provided a clever tutorial, you weren’t asking for parenting advice. 😀 I was such a better parent before I had kids, too!
Cassie May says
thanks so much Michelle! 😉
Jessica Barclay says
I have a question… Is the cotton batting necessary? Or could I possibly leave it out?
Cassie May says
Sure you could leave it out! I just wanted it to be a little more absorbent in case of really wet boots 🙂
Marge says
I love your idea. I don’t have little kids, but I do have a small dog who literally shredded the back of my driver’s seat. He loves to go for rides in the car, but if we leave him in the car, even for just a few minutes, he gets bored and starts destroying things. I thought I was going to have to replace the seat, but now I can make one of your ingenious covers and not be embarrassed when my friends ride in the back seat.
Thanks
p.s. Do you have any ideas for covering chewed up sun visors & the head liner in my car?
Cassie May says
Ha! I wish I did, that’s not a problem I’ve had to deal with yet!
Peggy Novak says
I agree that the negative comments must be coming from childless people or those 3 or 4 people with perfect children. I am going to make these for my car and my daughter’s van. Great idea!
Lisa says
Kudos to you! Kids will always be that “just kids” ! They will always put their feet on the back of the seat in front of them. No point in stressing it! This is a great idea! Hats off to you for thinking of it. Thanks for the idea. Mommy of 2 and grandma of 5 wish I had this 36 years ago!
Cassie May says
Thank you Lisa!
Patricia says
Great IDEA!!!! I am happy someone thought of that. I have some fabric left over and will be making one this weekend. And the best thing is that I will not have to tell my 23 mont old to keep his feed down.:) thank you 🙂
Cassie May says
Thank you! As several people have pointed out, little ones shouldn’t ride with their feet propped up, it’s dangerous in the event of a crash. But this seat cover works great for when they’re wiggling or kicking or climbing in and out! Thanks for stopping by!
Lisa @ Wine & Glue says
What a GREAT idea!! No matter how many times we tell my three year old to put her feet down, she keeps trying to touch the back of the seat with her toes. Someday her stubbornness will serve her well in life, but until then, a seat cover it is!
Tempi Montgomery says
I’m not sure how this can be confusing or negative. My son is special needs, one of his favorite things to do is ride in the car. When he does he tends to get very excited about the things he sees and likes to try to move around to look; he often puts his feet on the back of the seat to get a better view. He managed (bless his heart, he knows no better) to tear the back of the seat right off. When I saw this on Facebook, I thought, “what a life saver”. Your child doesn’t have to be disobedient or I’ll mannered. Sometimes they are SPECIAL and for that I thank you.
Cassie May says
You know, I was totally surprised too! I suspect the negative nellies don’t have any children of their own 😉 Glad it’s an idea that works for you! Thanks for stopping by!
Joyce says
Sorry you had to suffer thru negative responses to your wonderful idea! It takes all kinds. I will be making this soon. Remember, everyone’s sewing projects are unique and it is wonderful if you and other sewers take the time to share your ideas. I so appreciate them!
Cassie May says
Thanks Joyce!
Cassie May says
oh and p.s. if he’s already ripped the seat back, I would consider using two reinforced straps that tie around the headrest at the top instead of the elastic I show. I think that would work better and be stronger for you! good luck!
Lena says
I keep wanting to make one of these but since we’re flying back to Japan on the 3rd of December I keep trying to put it out of my mind… I hate taking off his shoes though every time he gets in the car! Too much extra work haha. 🙂 LOVE the fabric too!
XO/Lena @ Root&Blossom
Cassie May says
It doesn’t take long, promise! You’ll be so glad when you have it! 😉
Mari says
Wow what an awesome idea!!! Looks like a money maker to me wink wink. I think it’s a great thoughtful gift as well to friends & family with little ones. Very personal. Thanks for share :)!
hellstarofficials Hoodie says
Dress in confidence with Hellstarofficials Hoodies. Unleash your unique style with our premium-quality, trendy designs. Stay comfortable, stay fashionable. Hellstarofficials Hoodie 20 % Discount .Free and fast shipping worldwide.
https://hellstarofficials.us/