Knit up an adorable cuddly cow hat for your baby or toddler with my newest knitting pattern!
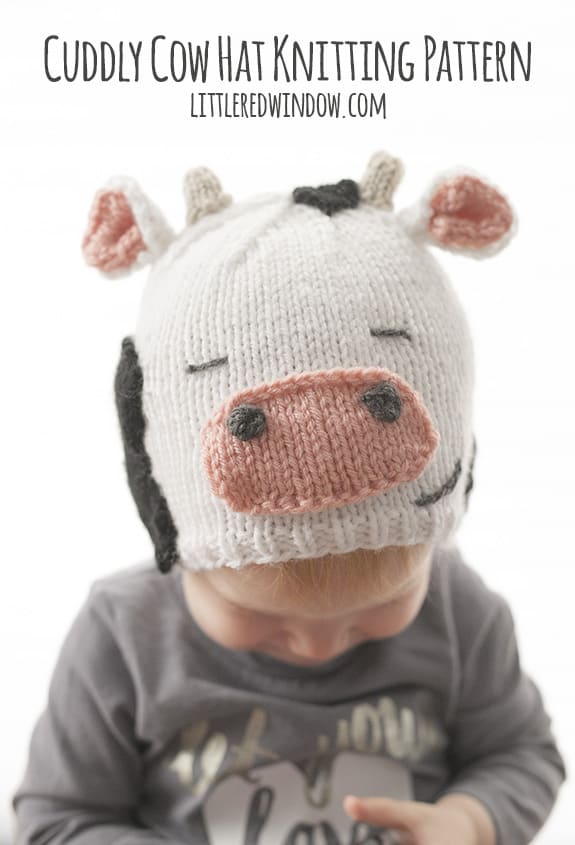
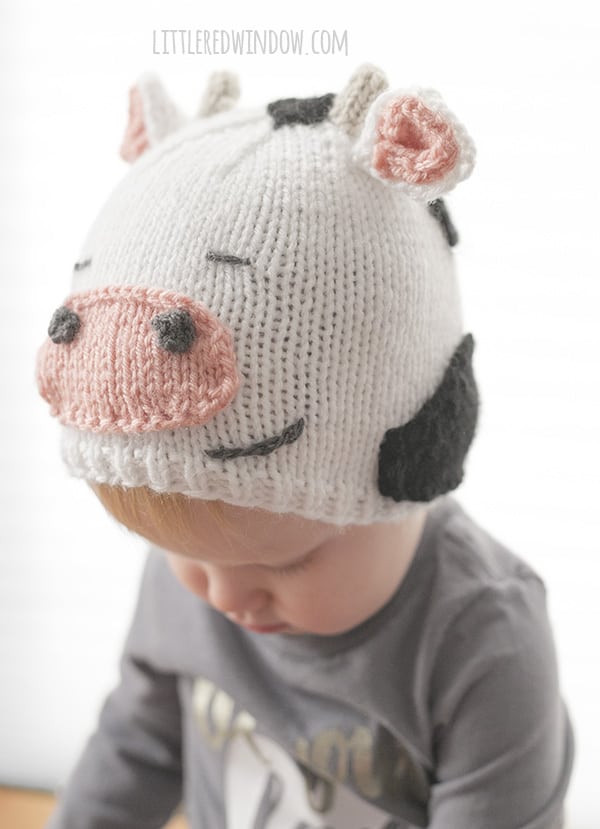
Did you guys know I’m originally from Wisconsin? Yep! Born and raised. With a natural undying love of cheese. It wasn’t until I went to college that I learned that not all kids go to a dairy to watch cheese being made as a field trip in school. What?! You didn’t all do that? Anyway, I can’t believe it’s taken me this long but I finally made a cow hat, and boy is it cute!
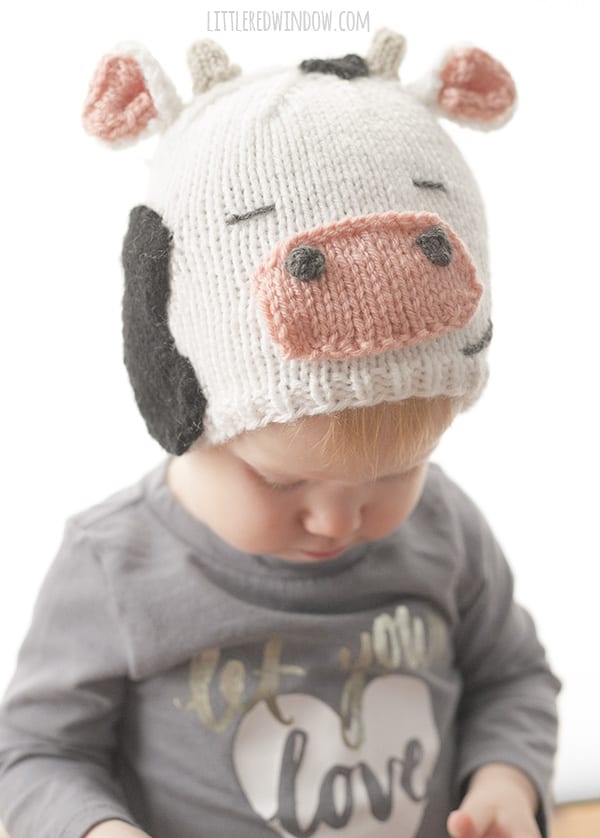
Wouldn’t this hat be such a cute gift to give to someone from WI? Or a little one who loves farms? Or someone who lives on or near a farm? Ok, it would be a cute gift for anyone, let’s just go with that. I’ve got the pattern free in one size here so scroll on down or keep reading for info on other sizes.
Looking for the pattern? Here’s how it works: This pattern is available for FREE in one size right here on my site (keep scrolling down). Or for just a few dollars, you can choose to purchase an upgraded PDF pattern that is nicely formatted and easy to print. Besides being easy to print, the PDF pattern also contains MORE SIZES with instructions for additional sizing including 0-3 months, 6 months, 12 months and 2T+! Thank you for supporting Little Red Window!
Cuddly Cow Hat Knitting Pattern
(12 mo. size, see PDF upgrade for other sizes)
Gauge: 20 st. = 4 inches
Worsted weight yarn in white, black, tan and pink
US 7 16″ circular knitting needles
(If you need help, my favorite knitting reference book for everyone from beginners to advanced knitters is THIS ONE!)
Cuddly Cow Hat Knitting Pattern Instructions
Using long-tail cast on, cast on 72 stitches onto your circular needles with the white yarn color. Join to knit in the round and k1, p1 in a rib stitch for 5 rounds.
Knit all rows until the hat is about 5 inches long.
Decrease (divide your stitches evenly between 3 double pointed needles and knit with the 4th):
Round 1: (k6, k2tog) and repeat to the end of the round.
Round 2: Knit all stitches
Round 3: (k5, k2tog) and repeat to the end of the round.
Round 4: Knit all stitches
Round 5: (k4, k2tog) and repeat to the end of the round
Round 6: Knit all stitches
Round 7: (k3, k2tog) and repeat to the end of the round.
Round 8: Knit all stitches
Round 9: (k2, k2tog) and repeat to the end of the round.
Round 10: Knit all stitches
Round 11: (k1, k2tog) and repeat to the end of the round.
Round 12: Knit all stitches
Round 13: k2tog and repeat to the end of the round.
Cut yarn, pull through loops and close. Weave in ends.
Outer Ear (make 2):
Using double pointed needles as straight needles, cast on 10 stitches with the white yarn, leave a long cast on tail to stitch the ears to the hat.
Rows 1 – 6 : knit odd rows, purl even rows
Row 7: k2tog, k6, ssk
Row 8: purl all stitches
Row 9: k2tog, k4, ssk
Bind off and weave in that end.
Inner Ear (make 2):
Using double pointed needles as straight needles, cast on 8 stitches with the pink yarn , leave a long cast on tail to stitch the inner ear to the outer ear.
Rows 1 – 6 : knit odd rows, purl even rows
Row 7: k2tog, k6, ssk
Bind off and weave in that end.
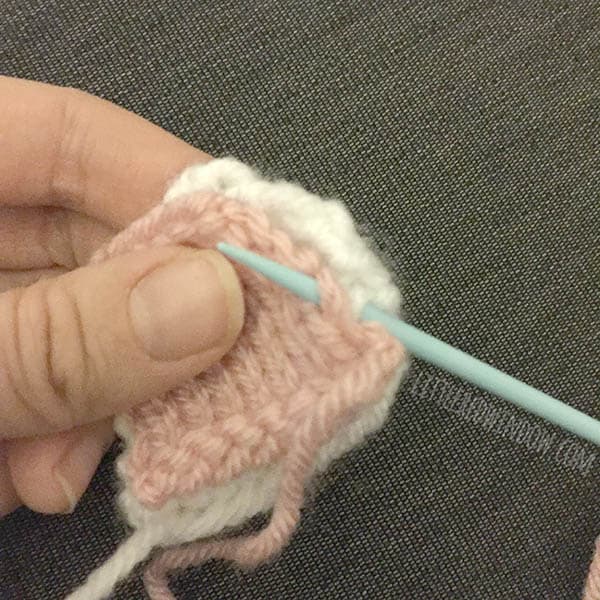
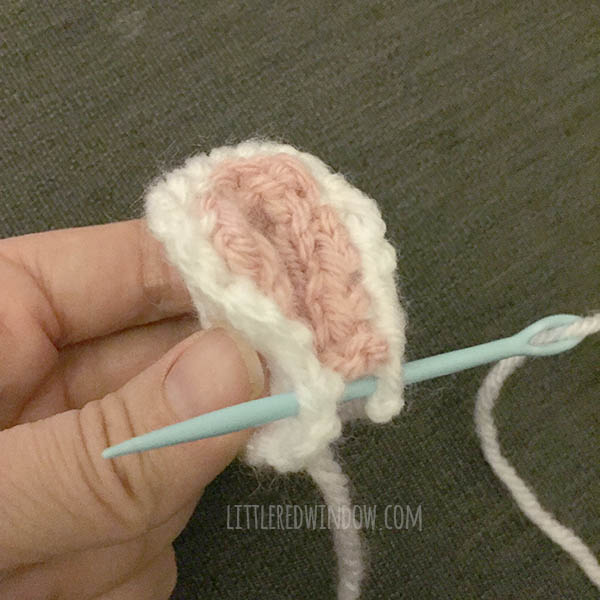
To assemble the ears: First use the long tail on one pink inner ear to whipstitch it wrong (purl) sides together to one white outer ear. Make sure your stitches don’t show through to the other side of the outer ear. Knot the yarn and weave in the end. Repeat with the other ear parts.
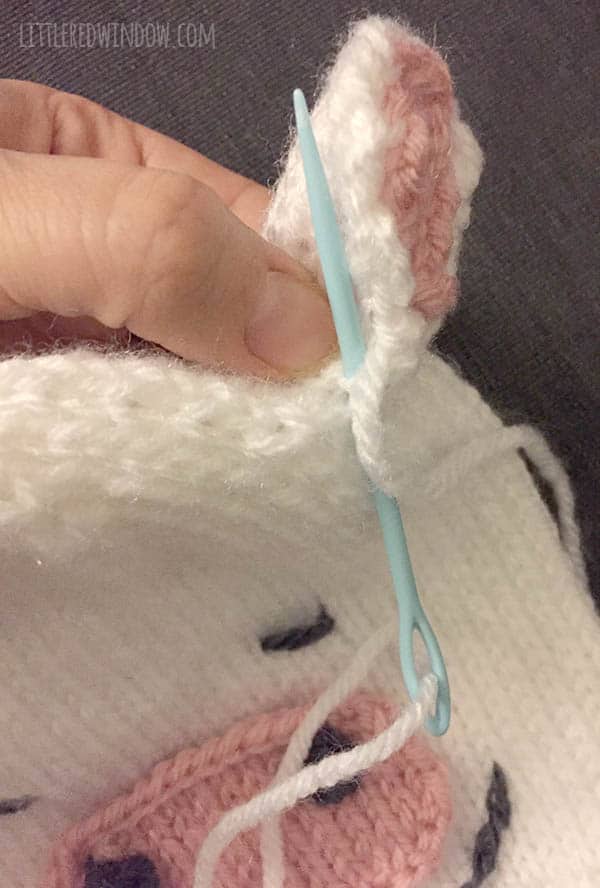
Then thread one white outer ear cast on tail onto your yarn needle. Pinch the assembled ear at the base and take one stitch through it to help it hold its shape. Finally, sew each ear to the top of the hat.
Horns (make 2):
Using double pointed needles, cast on 8 stitches with the tan yarn, divide them evenly between three needles and join to knit in the round. Leave a long cast on tail to stitch the horns to the hat
Rounds 1 – 4: knit all stitches
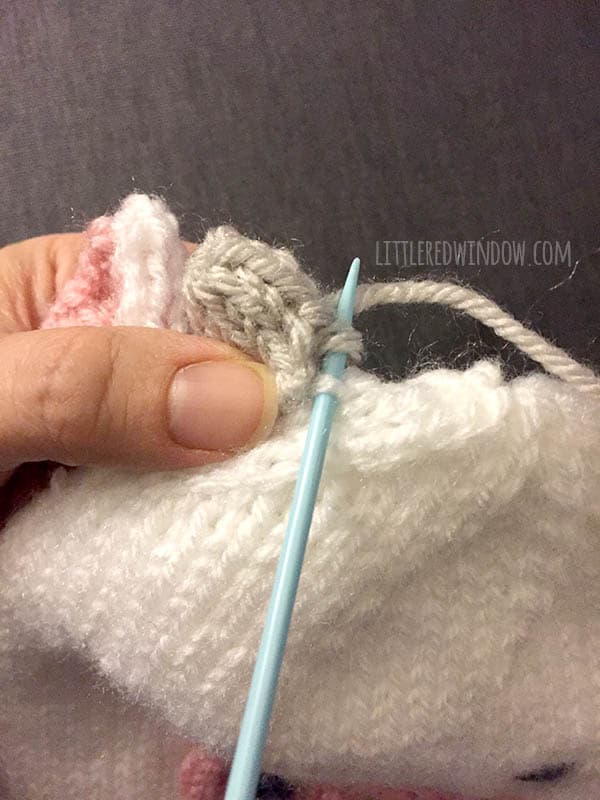
Cut your yarn and pull through loops to close, knot and pull the yarn tail to the inside of the horn and use it as stuffing to make the horn stand up. Cut off any excess. Use the long cast on tail to stitch the horns to top of the hat between the ears.
Nose:
Using double pointed needles as straight needles, cast on 10 stitches with the pink yarn. Leave a long cast on tail to stitch the nose to the hat.
Row 1: kfb, kfb, k6, kfb, kfb
Row 2: purl all stitches
Row 3: kfb, k12, kfb
Rows 4 – 8: knit all odd rows, purl all even rows
Row 9: k2tog, k12, ssk
Row 10: purl all stitches
Row 11: k2tog, k2tog, k6, ssk, ssk
Bind off and weave in that end.
Nostrils (make 2):
Using double pointed needles as straight needles cast on 2 stitches with the black yarn. Leave a long tail to stitch the nostrils to the nose.
Row 1: k2
Bind off and weave in that end. Use the long black cast on tail to stitch the nostrils to the nose. Then use the long pink nose cast on tail to stitch the assembled nose to the hat.
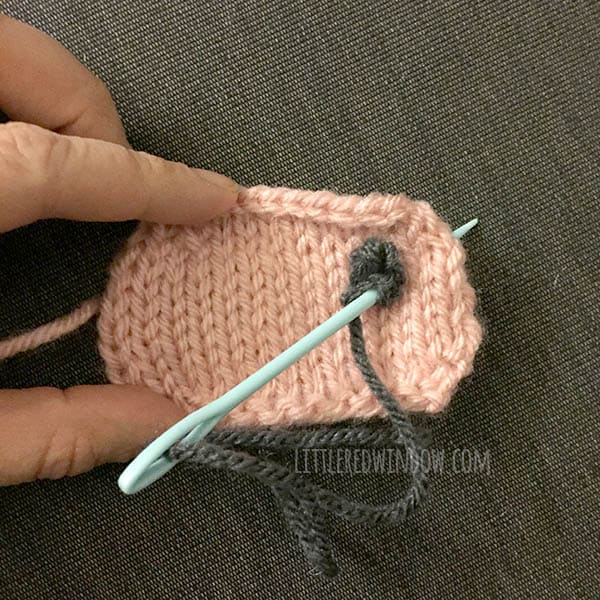
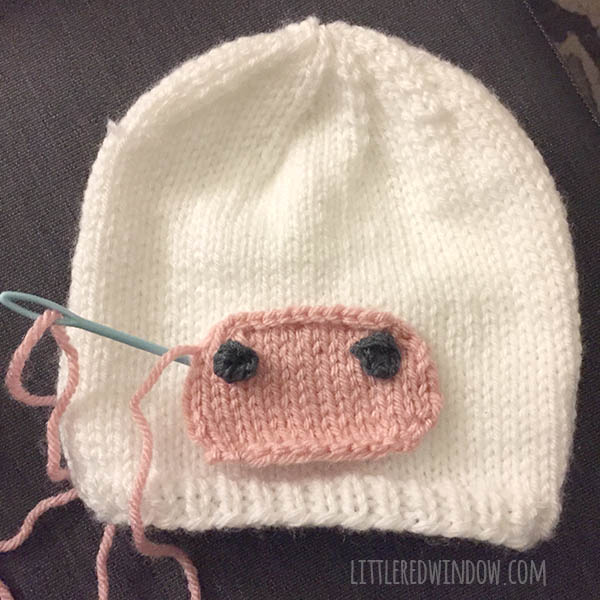
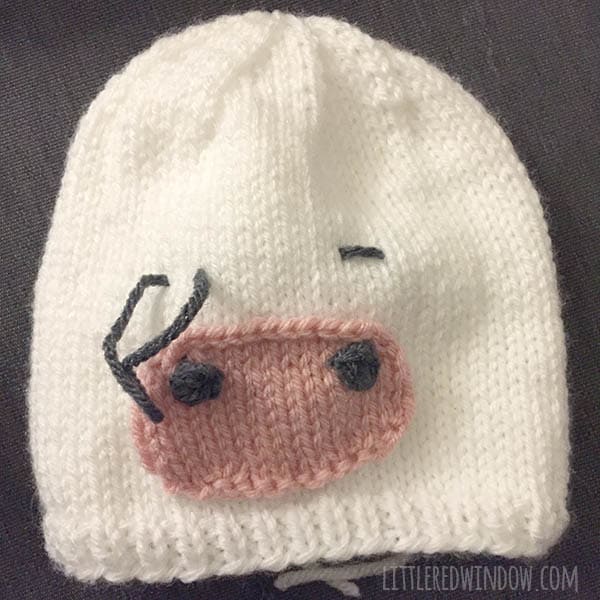
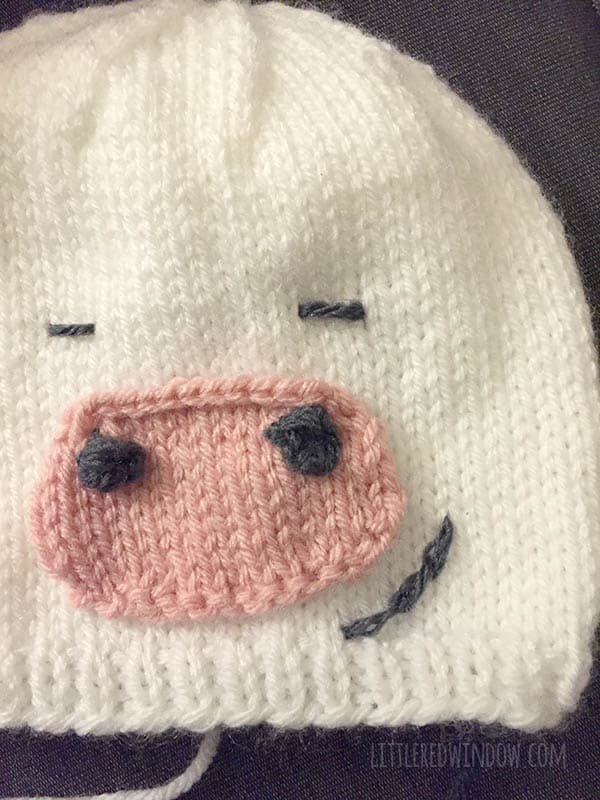
Thread your yarn needle with black yarn and make two short horizontal stitches for the eyes. Secure the yarn inside the hat. Make sure the eye stitches are fairly loose so they won’t pull when the hat stretches. Use another length of black yarn and use a loose backstitch to make a slightly curved u-shape for the cow’s smile.
To make the spots: I wrote patterns for three differently shaped cow spots. You can place them wherever you want on the finished cow hat or use my photos for reference!
Cow Spot #1:
Using double pointed needles as straight needles, cast on 3 stitches with black yarn. Leave a long tail to stitch the spot to the hat.
Purl all even rows
Row 1: kfb, k1, kfb
Row 3: kfb, k4
Row 5: kfb, k5
Row 7: k2tog, k5
Row 9: k2tog, k3, kfb
Row 11: kfn, kfb, k4
Row 13: kfb, k7
Row 15: kfb, k7, kfb
Row 17: kfb, k10
Row 19: k10, ssk
Row 21: k9, ssk
Row 23: k2tog, k6, ssk
Bind off and weave in that end.
Cow Spot #2:
Using double pointed needles as straight needles, cast on 6 stitches with black yarn. Leave a long tail to stitch the spot to the hat.
Purl all even rows
Row 1: kfb, kfb, k2, kfb, kfb
Row 3: kfb, k8, kfb
Row 5 & 7: knit all stitches
Row 9: k10, ssk
Row 11: k9, ssk
Row 13: k2tog, k8
Row 15: k2tog, k6, kfb
Row 17: kfb, k6, kfb, kfb
Row 19: kfb, kfb, k9, kfb
Row 21: knit all stitches
Row 23: k2tog, k11, ssk
Row 25: k2tog, k2tog, k5, ssk, ssk
Bind off and weave in that end.
Cow Spot #3:
Using double pointed needles as straight needles, cast on 12 stitches with black yarn. Leave a long tail to stitch the spot to the hat.
Purl all even rows
Row 1: kfb, kfb, k8, kfb, kfb
Row 3: kfb, k15
Row 5: k15, ssk
Row 7: k12, ssk, ssk
Row 9: k2tog, k8, ssk, ssk
Row 11: k2tog, k5, ssk, ssk
Row 13: k2tog, k2tog, ssk, ssk
Bind off and weave in that end.
Use the long cast on tails to stitch the spots to the hat.
If you want a much easier to print copy of this pattern with lots of additional size options come get it here:

If you liked this, you may also like some of my other posts…
- Double Stockinette Stitch Knitting Pattern: Easy How To for Beginners - April 18, 2024
- Fiery Fades Hats Knitting Pattern - April 16, 2024
- Flower Pillow Knitting Pattern - April 11, 2024




Gail Bertram says
Row 3 for the nose-Should that be k12 instead of k2?
Cassie May says
Well, yes it should! Thank you so much for letting me know, I’ve corrected it!
Gail Bertram says
Love this pattern! On row 11 of spot #1 it says “kfn”. I don’t know this abbreviation. Is it supposed to be “kfb”? Not trying to be picky, I just want to make sure I do it right! Thanks!!
Pepsi Jacobs says
Very cute love the pig also just wish there was a crochet version as I don’t knit.