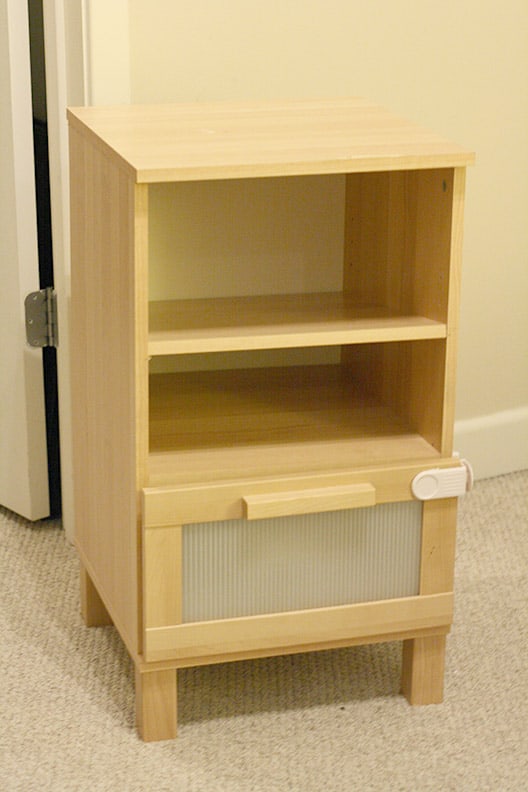
When it comes to crafting, I never shy away from a challenge. I have tried pretty much every craft out there. Ok, not stained glass, I haven’t tried that. (It’s sharp and scary!) But, Ukranian egg decorating using melted wax? Yep. Heat embossing? Sure! DIY lip gloss. No big deal! So when I noticed that at our friends’ houses, O always headed straight for the play kitchens, I decided I should make him one. And the internet is full of great play kitchens. I briefly thought I should maybe just buy him one but that wouldn’t be any fun, would it? (Plus we had some old Ikea nightstands in our bedroom that I secretly hated and this was a PERFECT excuse to exchange them for something else! Shhh, don’t tell AA!) Overall it took about a month with an hour here and an hour there, mostly on the weekends, and was probably one of the most fun projects I’ve done in a long time.
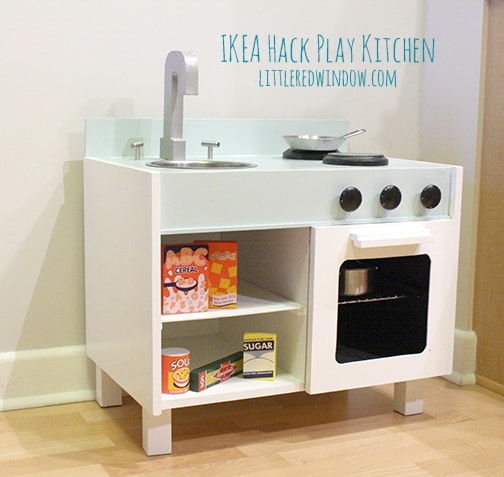
I think it was part of the Aneboda family (don’t you just love Ikea names?!). This was “birch” veneer and although pretty sturdy it was tall and thin instead of short and wide. Unfortunately I did this last fall so I don’t have picture of the process but basically, first I turned it sideways, then took off the legs and screwed them to the side. Then I removed the drawer and its tracks, moved the shelf and screwed it into place so that it was now vertical. Then I added a “backsplash”, installed the sink, added a piece across the front where the knobs go, and finally, used a wooden panel from the oil painting department of Michaels with a hole cut in the middle as the oven door. And then I, patched, sanded, and primed and primed and primed (that “birch” is tough to cover!) and painted and added knobs etc. Here’s the result!
I got the letter hooks at Michaels in the dollar section and painted them to match so O has a place to hang his pots and pans.
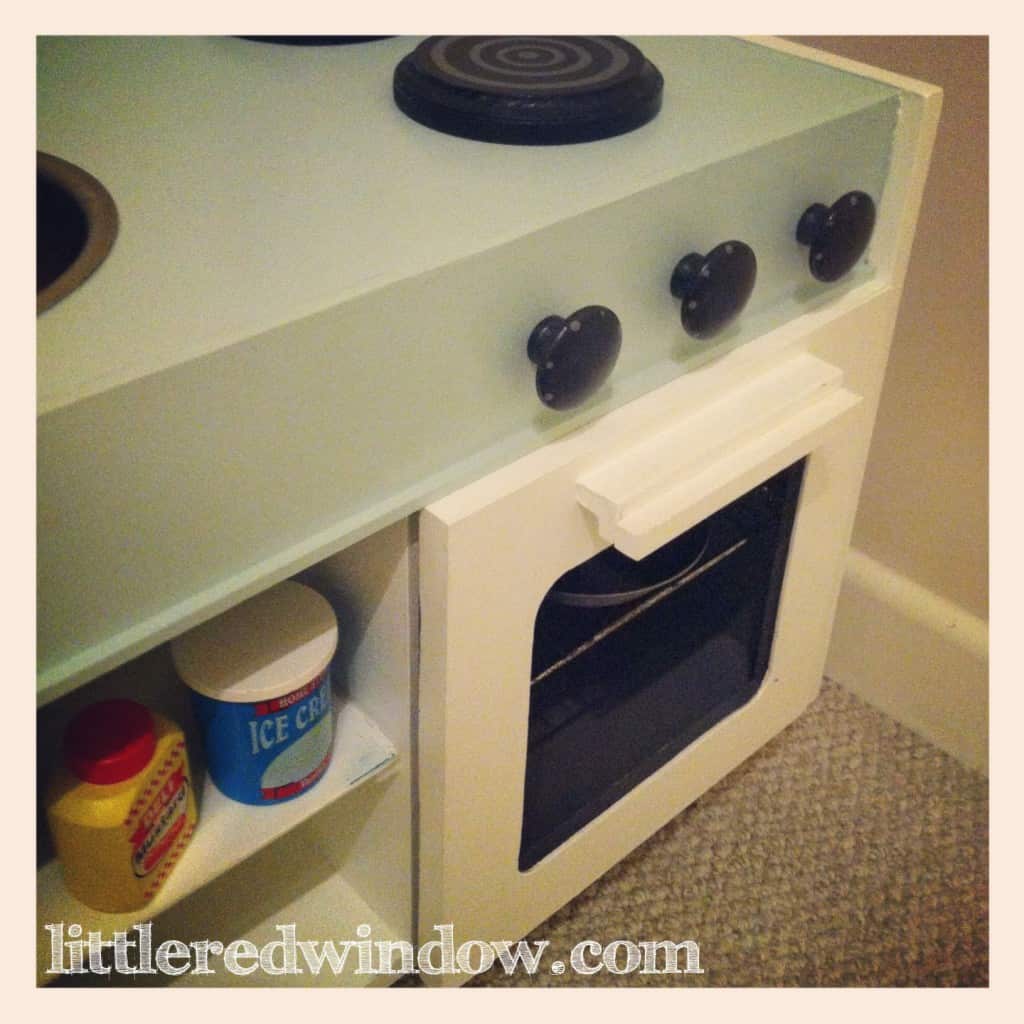
The “burners” are round wooden plaques from the craft store that I painted and then attached to the top from underneath.
The oven door opens out and has a handle that keeps it from crashing into the floor and the stovetop knobs were just cheap wooden knobs from Home Depot that I painted and put through the front.
Inside the oven I used the rack from an old toaster oven and put in two small pieces of wood on either side so it actually pulls in and out just like a real oven! (Cleaning that old toaster oven rack was a project in itself! Let me tell you, a lot of those Pinterest tips on cleaning your oven with things like cream of tartar? They don’t work. Trust me.)
I don’t have an accurate tally but I think with coupons and sales, the cost came in somewhere around $30 (I already had primer and paint). Not bad, right?
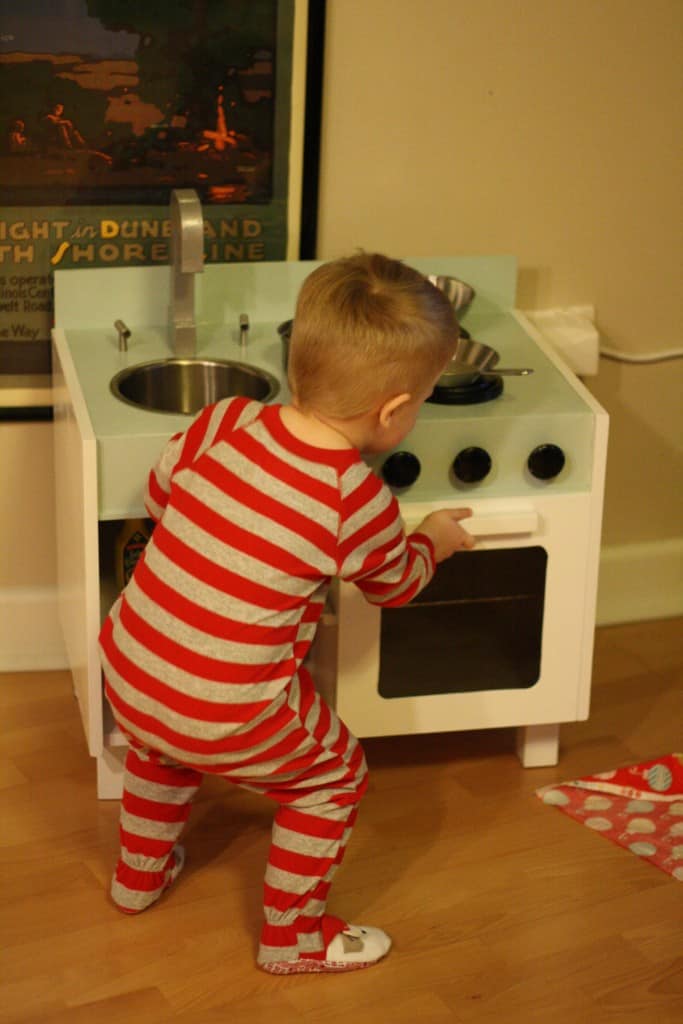
We put it out Christmas morning and it has been a big hit ever since!
I still have one more of these horrible nightstands taking up space in my spare room. Should it just be more counter space? A fridge? Microwave? What do you think?
- Rib Zag Hat Knitting Pattern - April 23, 2024
- Double Stockinette Stitch Knitting Pattern: Easy How To for Beginners - April 18, 2024
- Fiery Fades Hats Knitting Pattern - April 16, 2024


Cynthia says
Can you provide dimensions of the finished project?
Cassie May says
It’s 15″ x 15″ x 28″
Michelle says
How did you make the hole for the sink?
Cathy Compeau says
OMG! Adorable! I would love for you to share and link up at my weekly TGIF Link Party if you haven’t already this week. Your favorite posts, most popular, recent or new! The party is open every Thursday night and closes Wednesday’s at midnight. Followed by (Not SO) Wordless Wednesday! http://apeekintomyparadise.blogspot.com/.
I would be honored if you join us and follow to stay connected Have a wonderful week!
Hugs, Cathy
Cassandra May says
Thanks, I will!
Linda Pennington says
Cassie, once again such a great craetive mind you have. Great success on this idea. I have seen Pinterest ideas using entertainment centers, that I would love to convert into kitchens, but Hayley says she does not have the room for them. This though, is perfect using a night stand. I think you should use the other night stand for the refrigerator. Now you have my creative juices going. I so want to create something. Congrats on another great DIY!
Kate says
Cassie this is amazing! I love it. As for the second nightstand…you could go for the microwave for sure, and counterspace is always nice. Or you could go in an entirely different direction and make a tiny space station city or multi-level tree house, or parking garage of some sort. I see a lot of Richard Scarry potential here.
Cassandra May @ Little Red Window says
omg, I did lip balm one time–COMPLETE DISASTER!!! Thank goodness my mom wasn’t home that day…
Lisa Longley says
This is awesome Cassie!! I love it! And now I know where to go to if I ever need a step by step on DIY lip stick 🙂